Stencilling onto fabric
Stencilling onto fabric
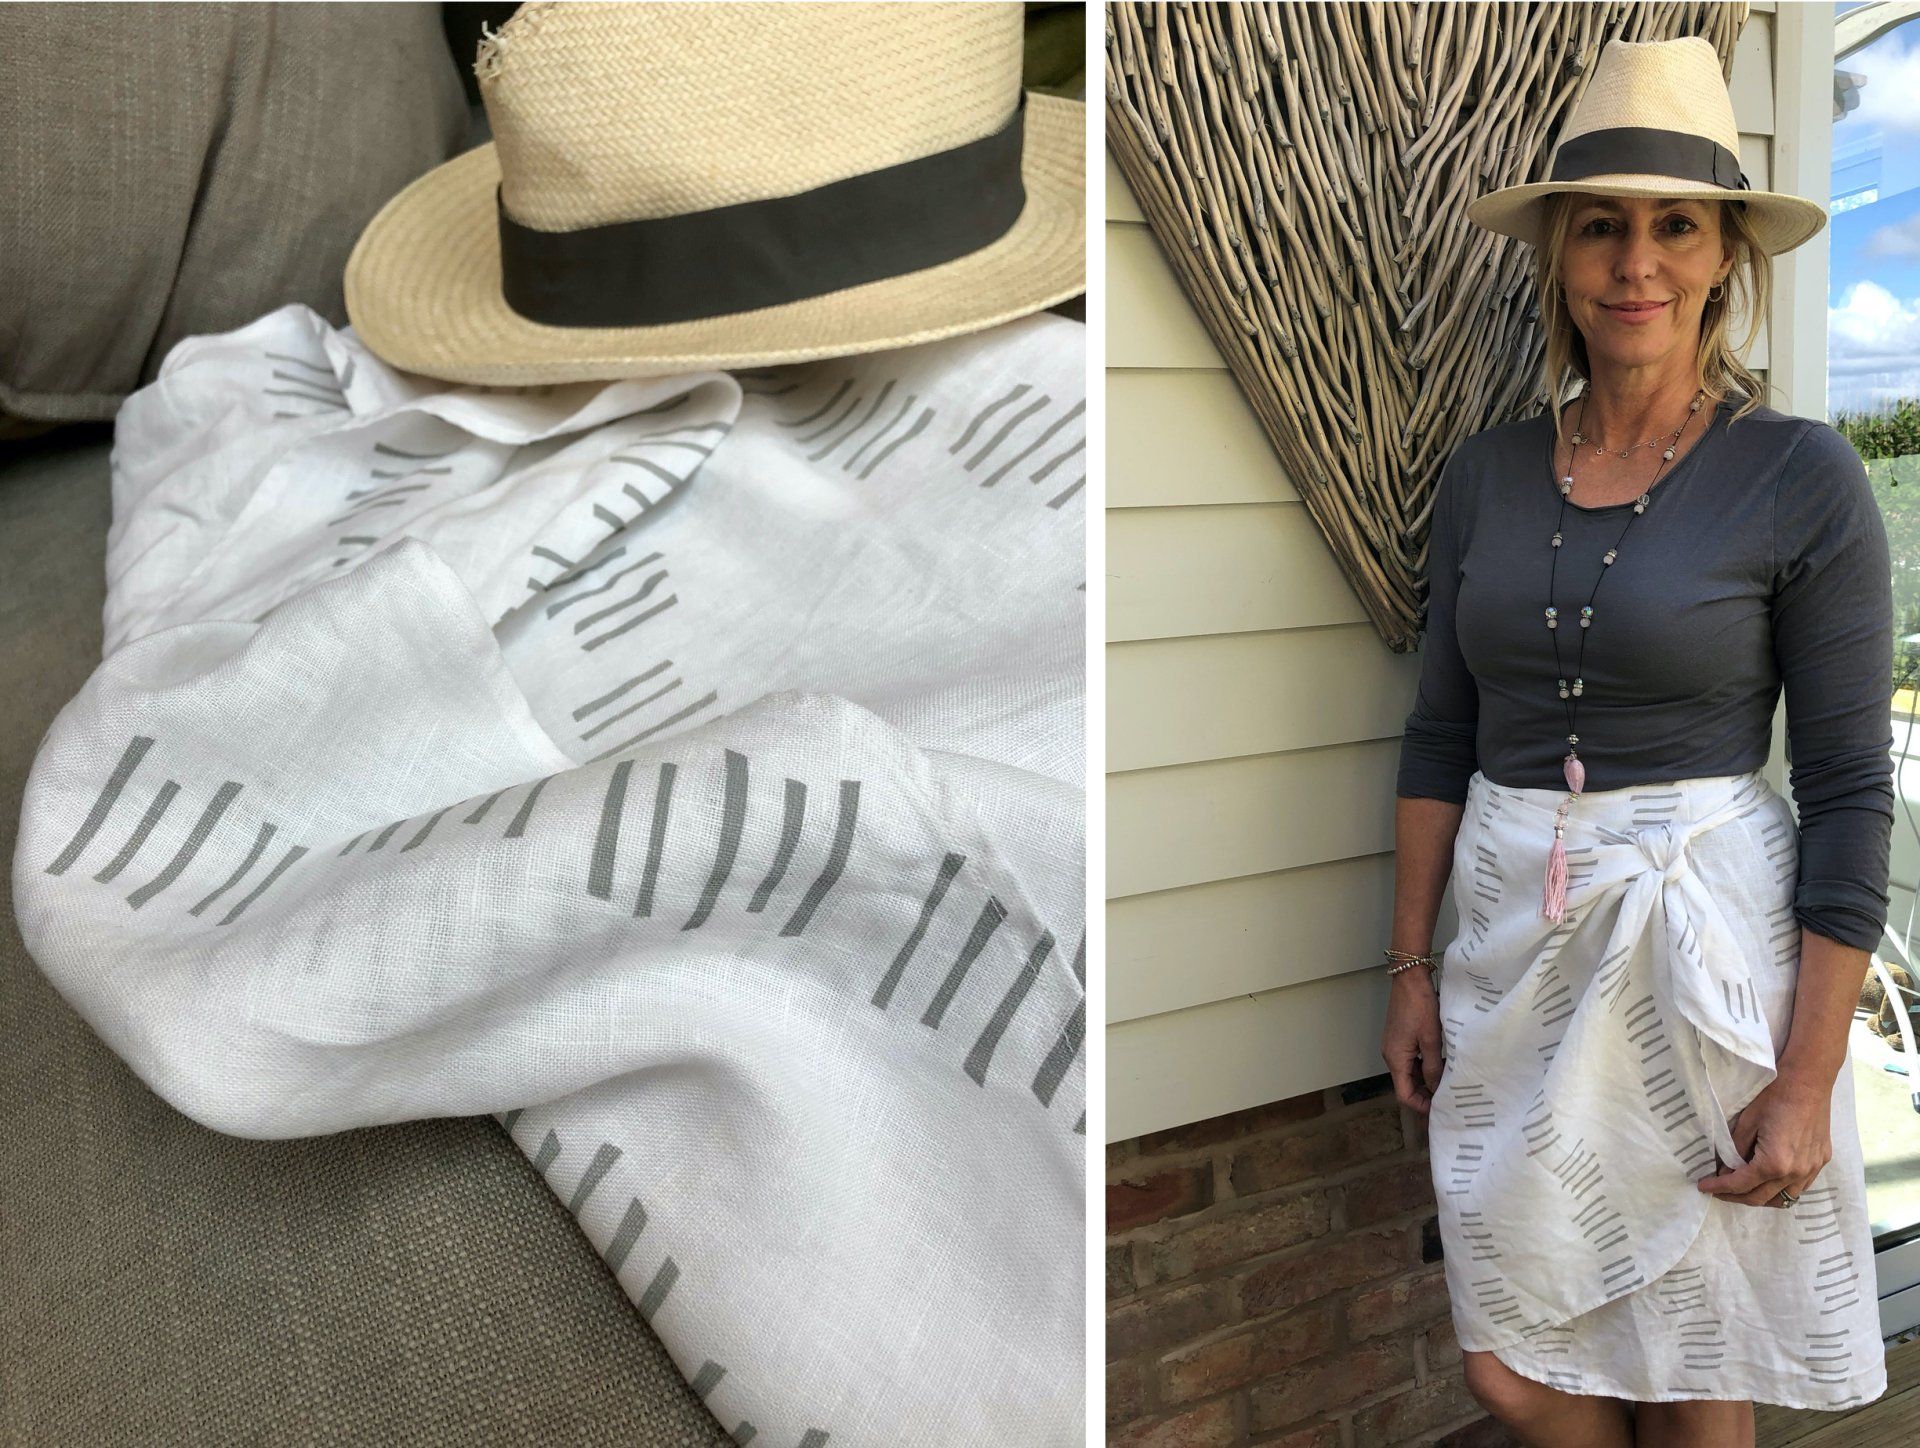
Printing on the Lydia Skirt by Cut Couture
If you've ever wanted to print your own fabric, stencilling is an excellent place to start as it is one of the easiest ways to add pattern to an item. It's cost effective and you have control over exactly where you position your print. I have designed 6 motifs that you can use for free on your own personal projects.
I will show you how to stencil, it's a very simple method and one you'll be able to master with a little practice.
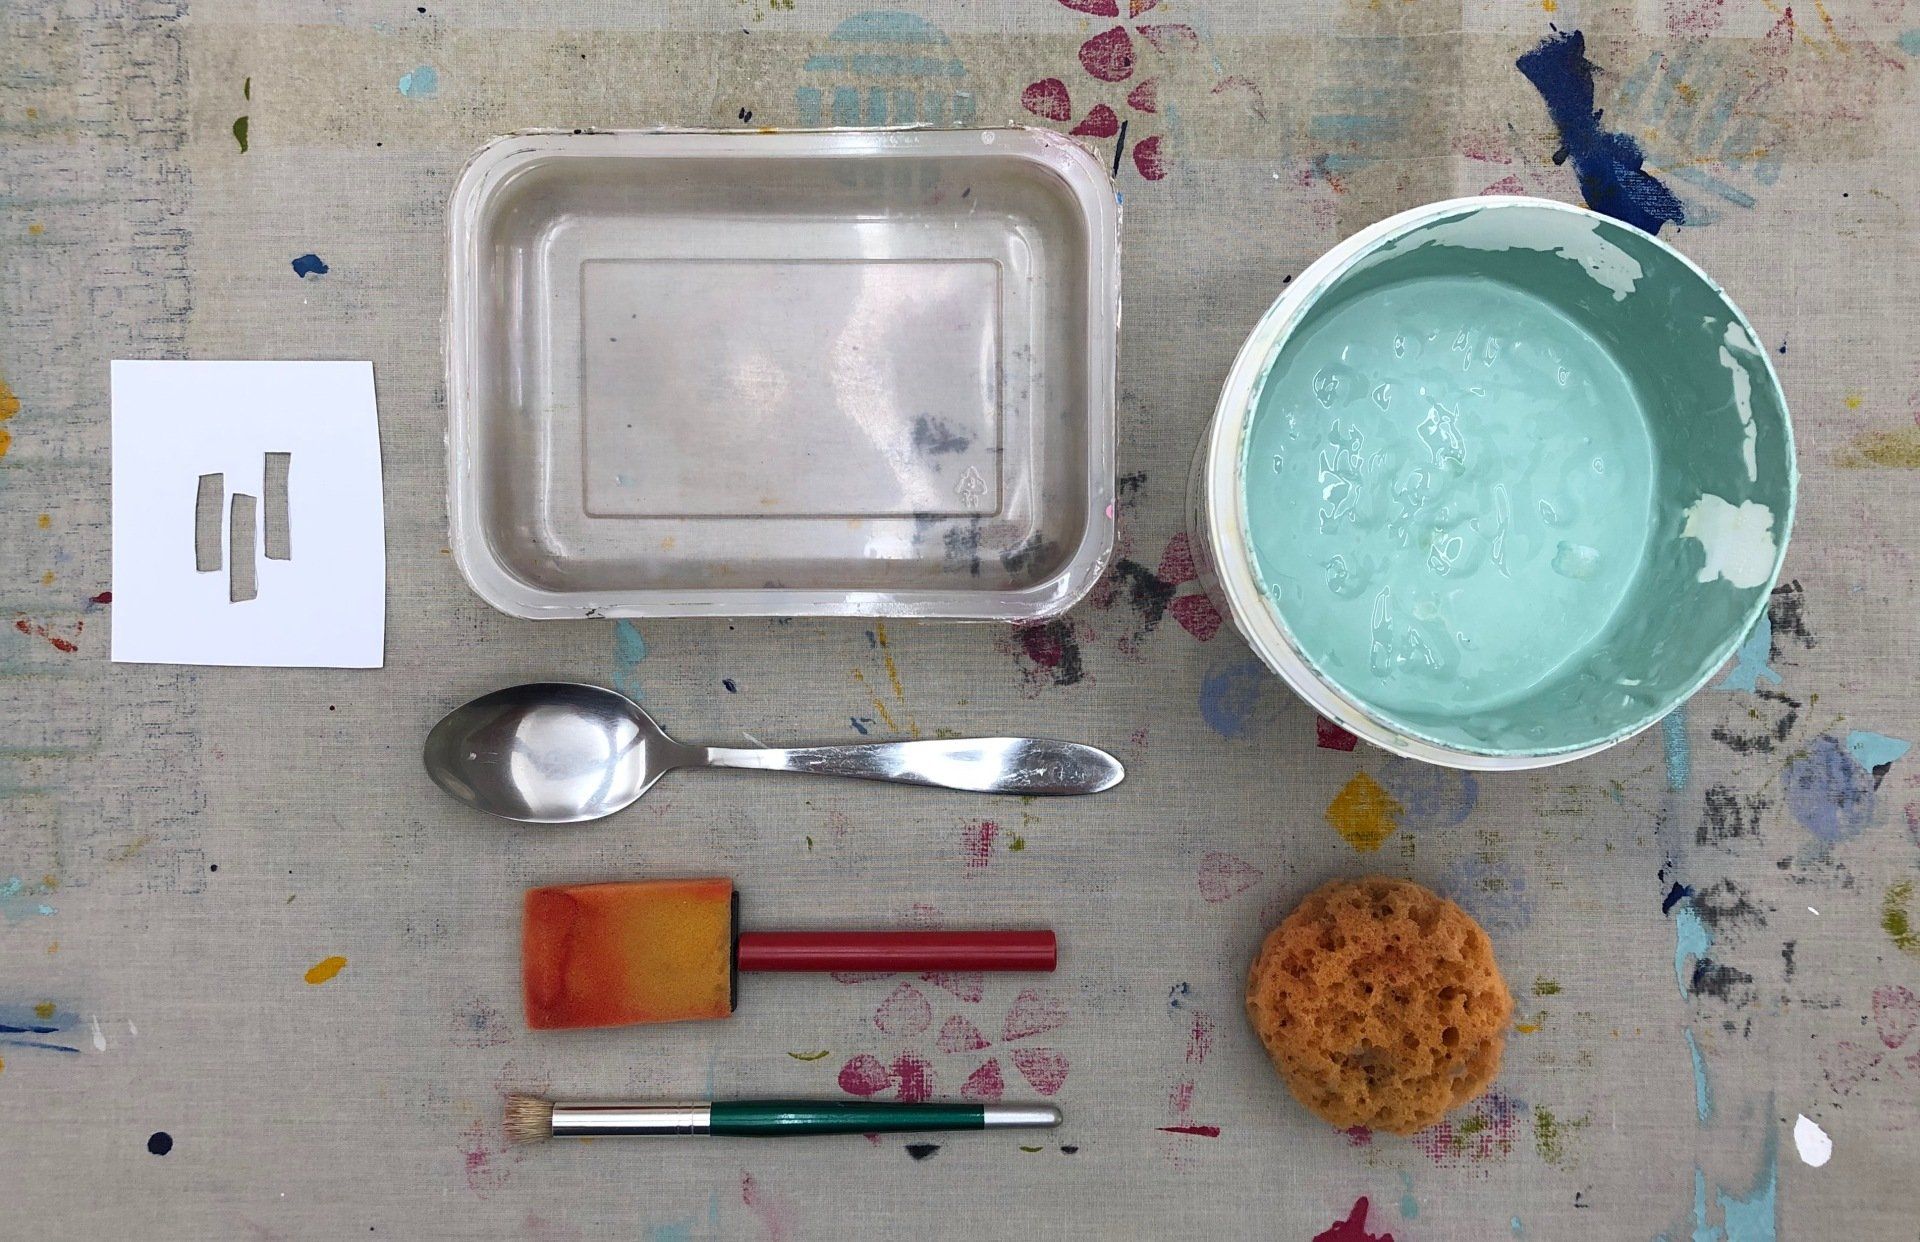
You will need:
a craft knife
a motif to stencil
textile ink, (I use Permaset Aqua screen printing ink, Speedball Textile ink will work well too)
white card
a stencil brush or a small sponge
an old plate / plastic tub for the ink
a spoon
masking tape
washed and pressed cotton / linen to print on
an old sheet to use as a drop cloth, ink will pass through your fabric and leave marks
Textile screen printing inks are available at Jackson's, your local art store or on eBay. Make sure you buy a fabric ink.
Before printing on your garment, practice on a spare piece of fabric or two and get comfortable with the process.
Before you start it's essential that you wash and press your fabric to remove any size. If you don't when you wash the fabric your printing may fade.
I recommend using cotton or linen as they absorb the ink well. You can print on most fabrics, but take into consideration you will need to heat set your fabric to make your fabric washable. This can usually be done with a hot iron, follow the instructions on the ink you are using.
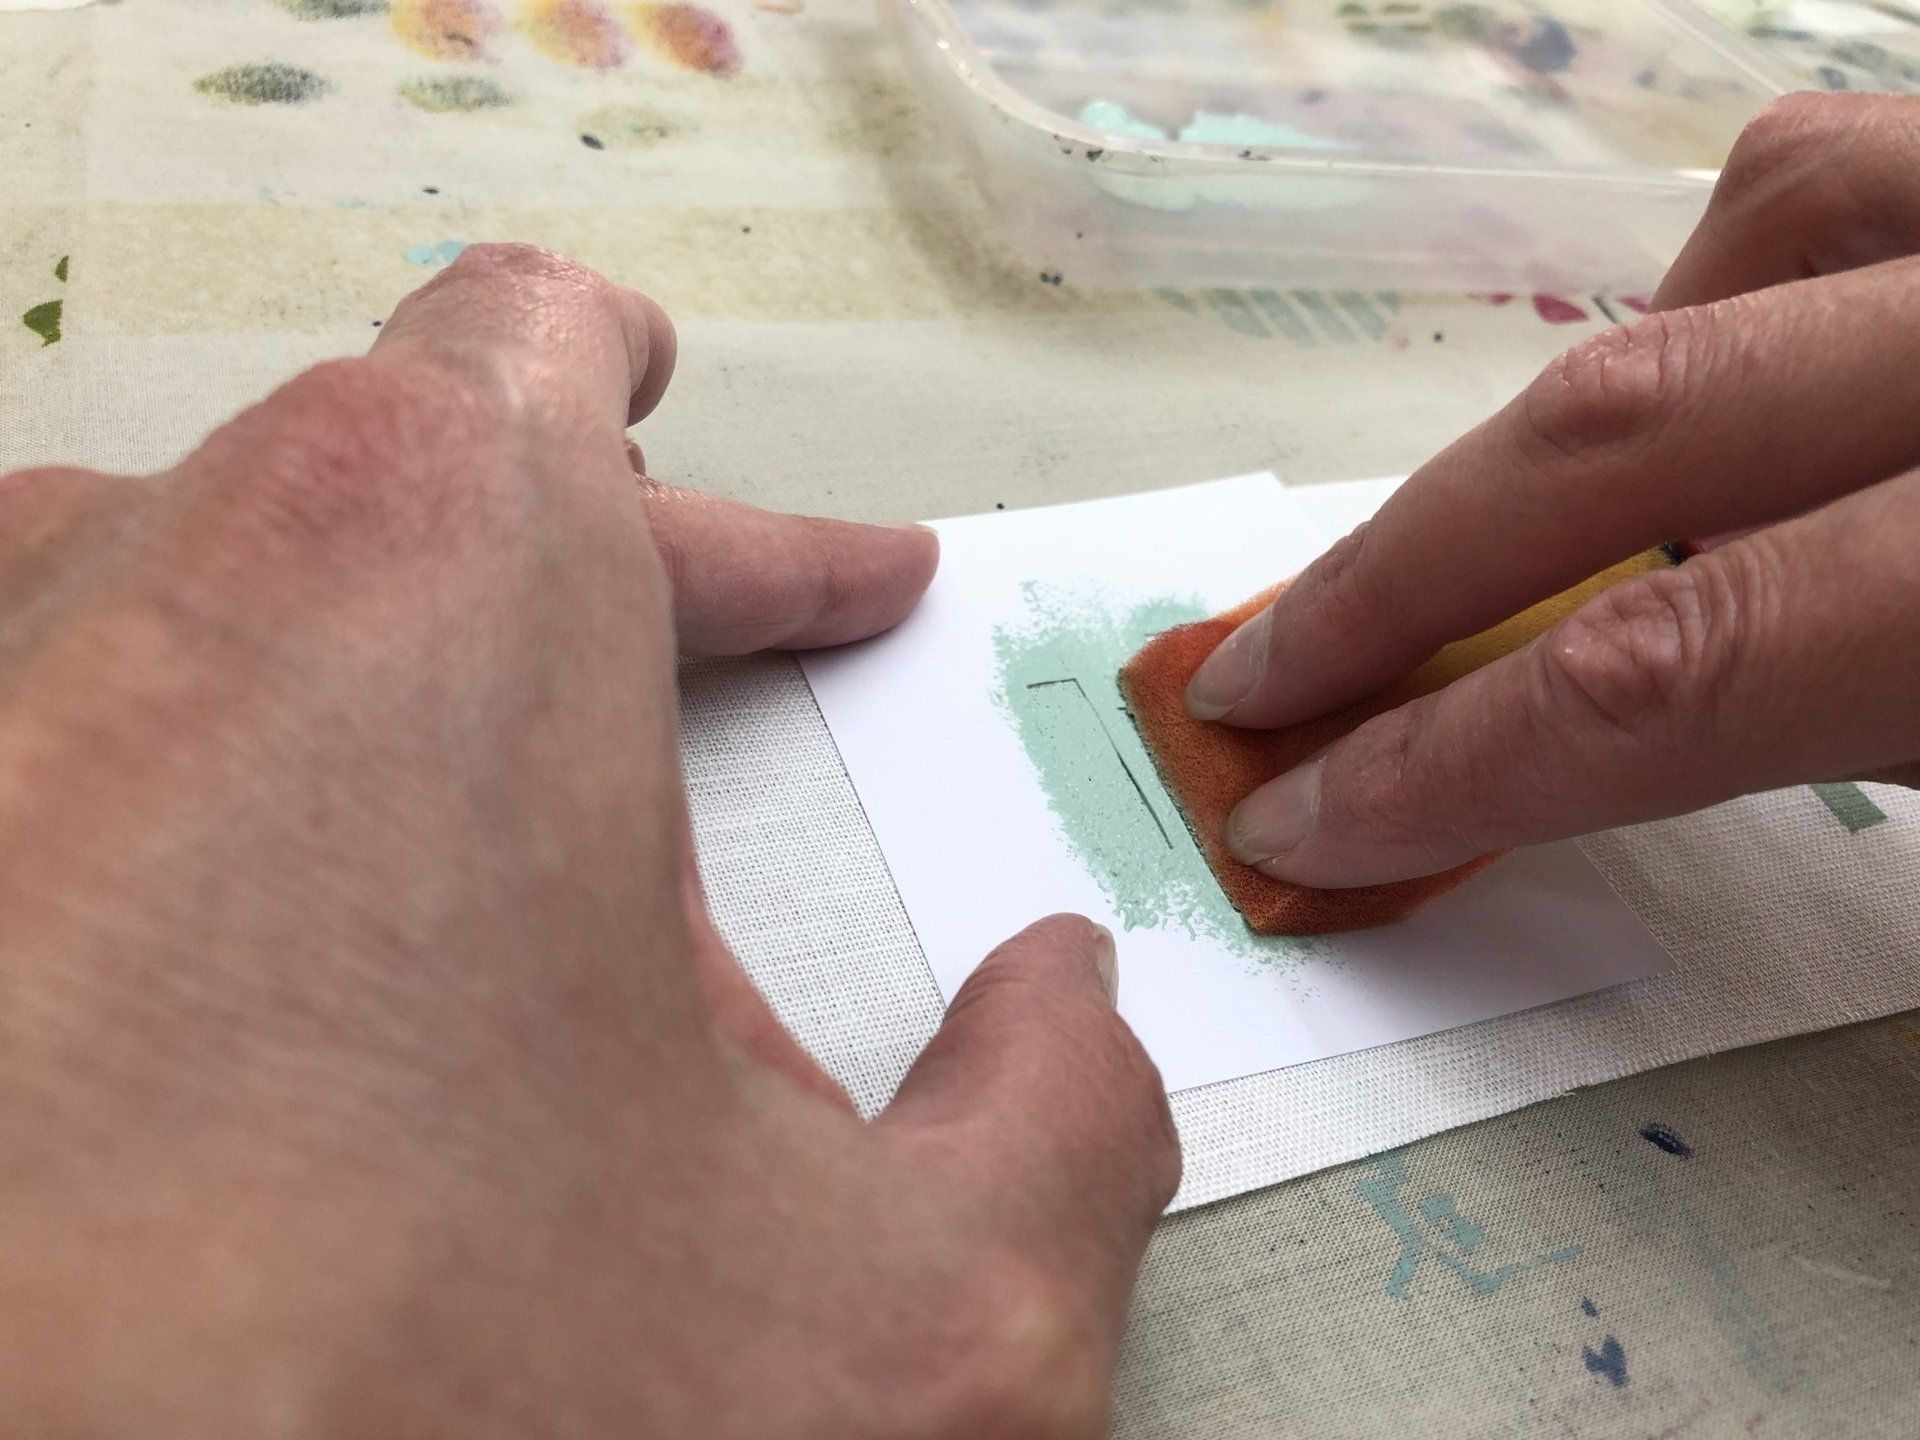
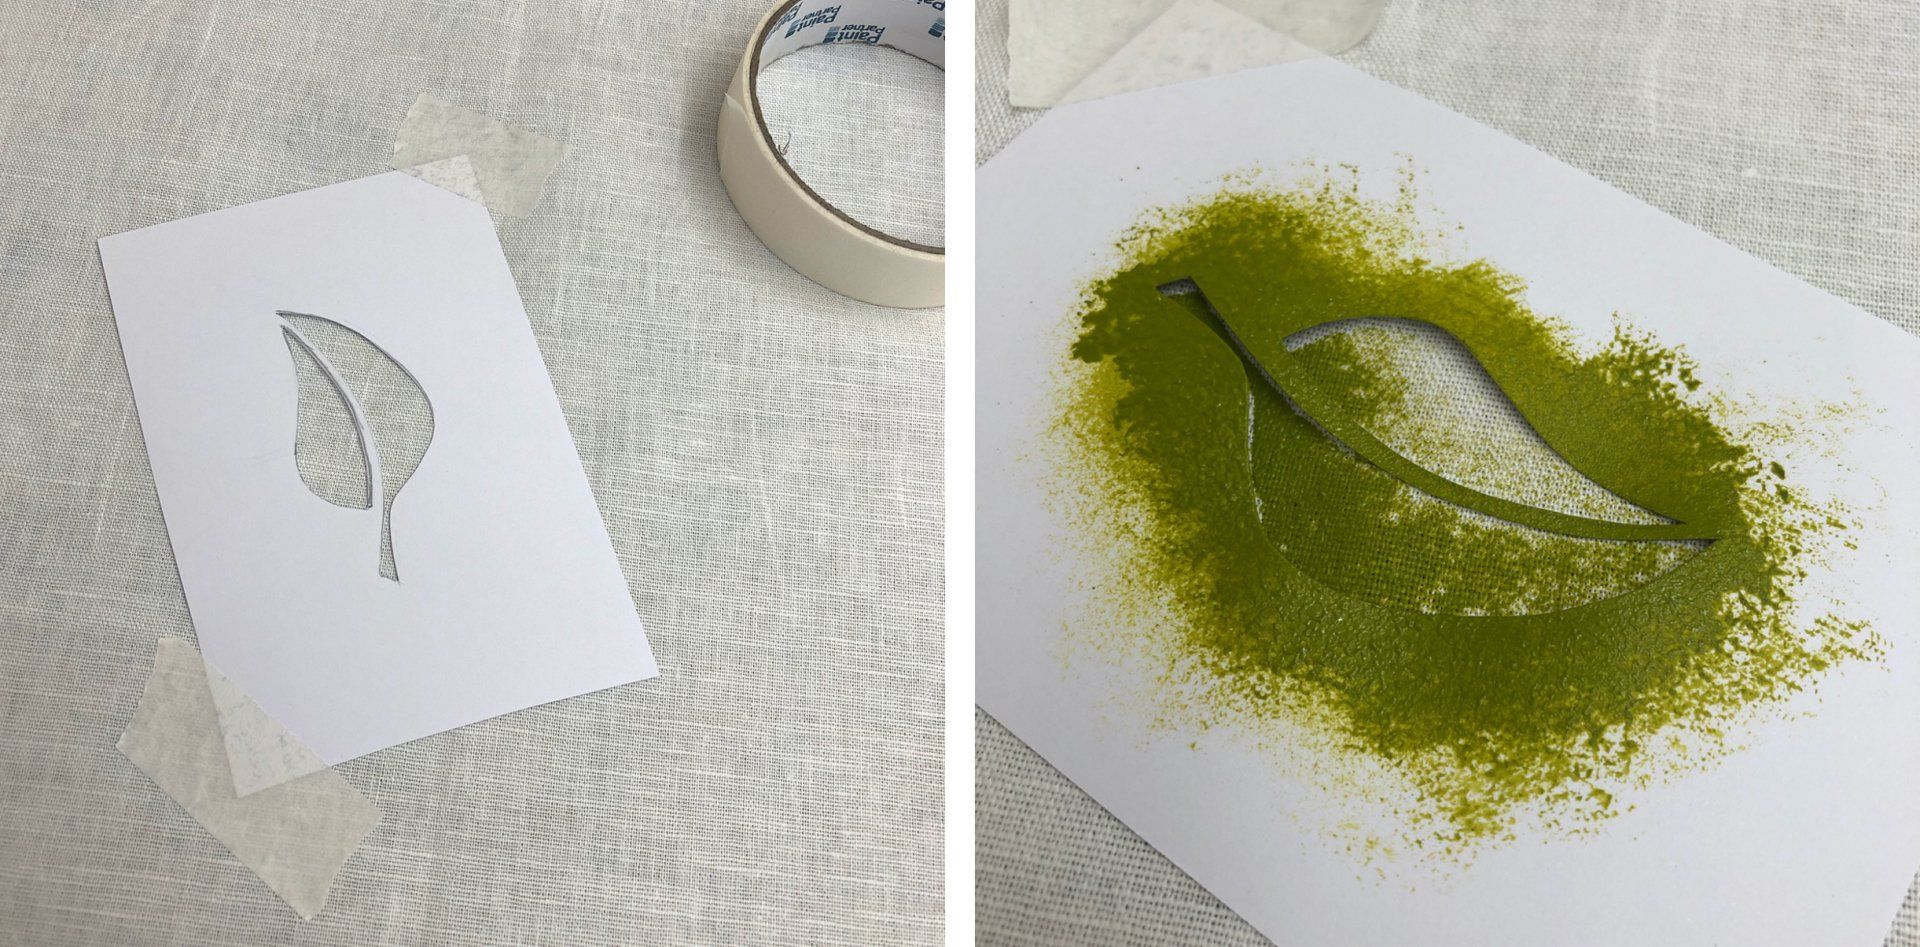
Trace your chosen design onto white card, tape to a window or use a light box if you have one. With a sharp craft knife, cut out the design you want to print, take care to cut all corners, go over the area a few times if necessary. Don't be tempted to pull out the excess as this will give you a torn corner and this won't print well.
If you're covering a large area with printing cut out 2 or 3 stencils, as they become wet with ink the gaps can become weak and may tear, it's useful to have a spare stencil ready so you can keep printing.
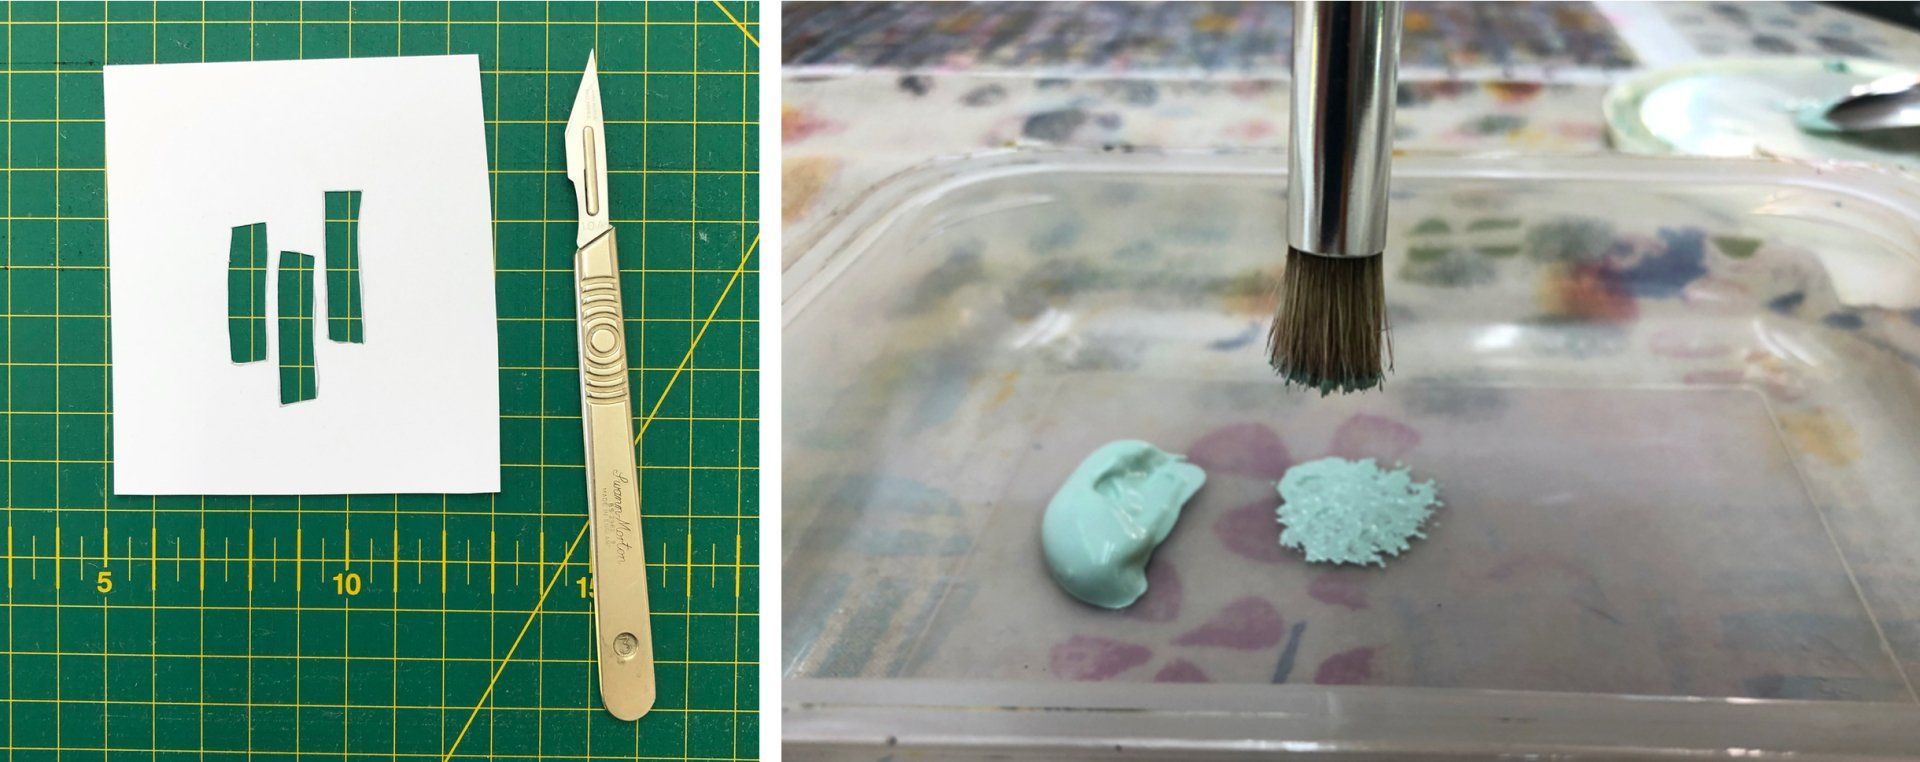
Spoon a small amount of Textile Ink onto your plate. Keeping your stencil brush upright, dip the brush into the ink and then dab it onto a clean area of plate, this will spread the ink evenly onto your brush. You want the brush to be fairly dry with ink and not dripping. You don't want to overload your fabric with ink, use a small amount and build up the colour rather than putting on a lot of ink which may bleed under the stencil and blur the edges of your print.
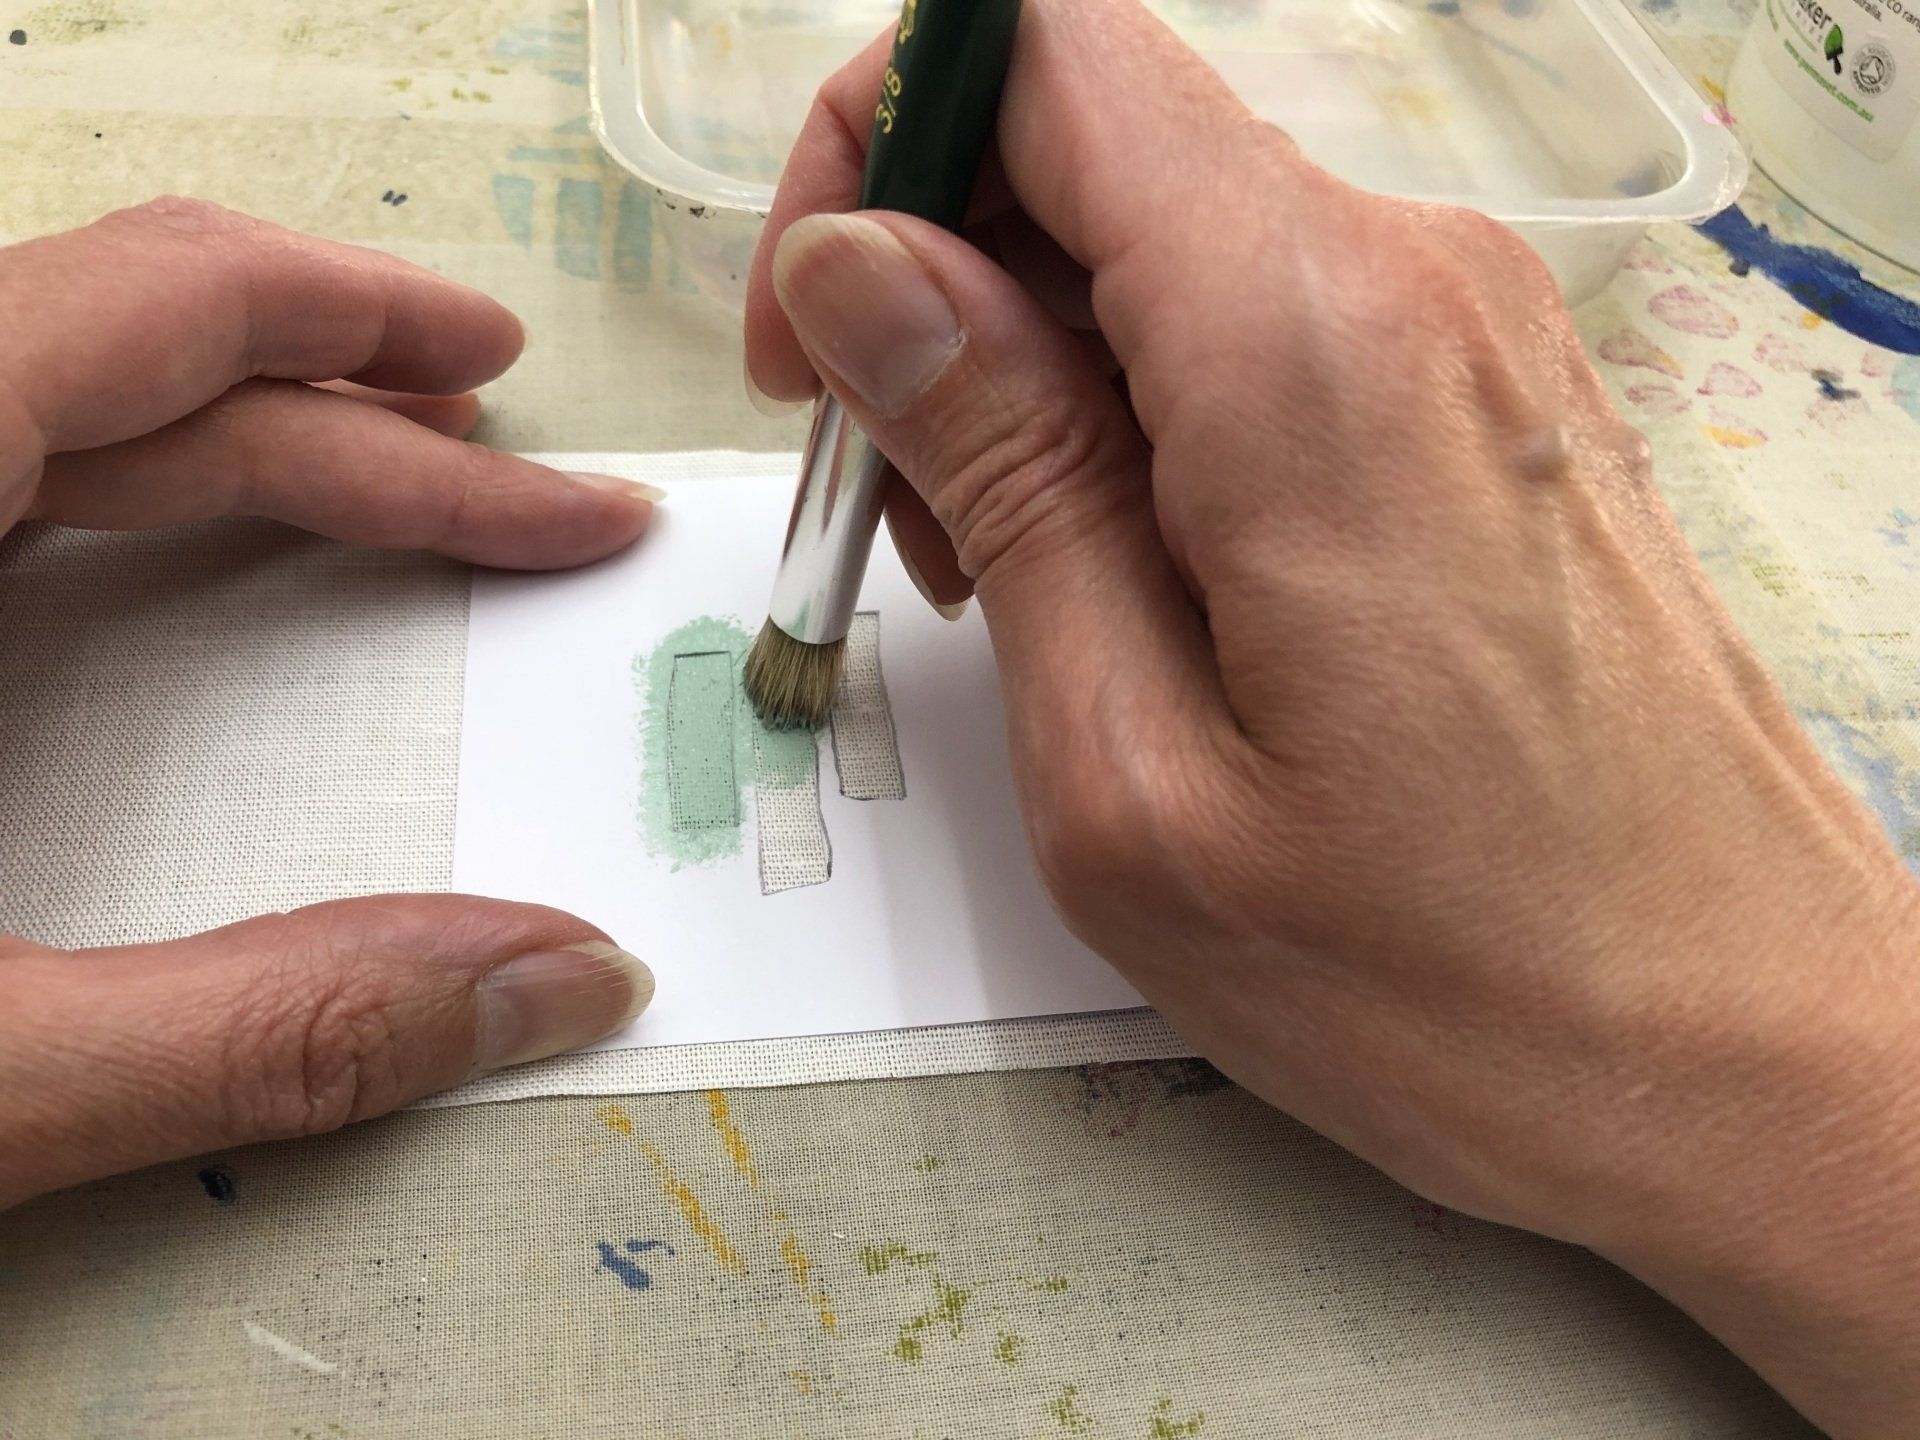
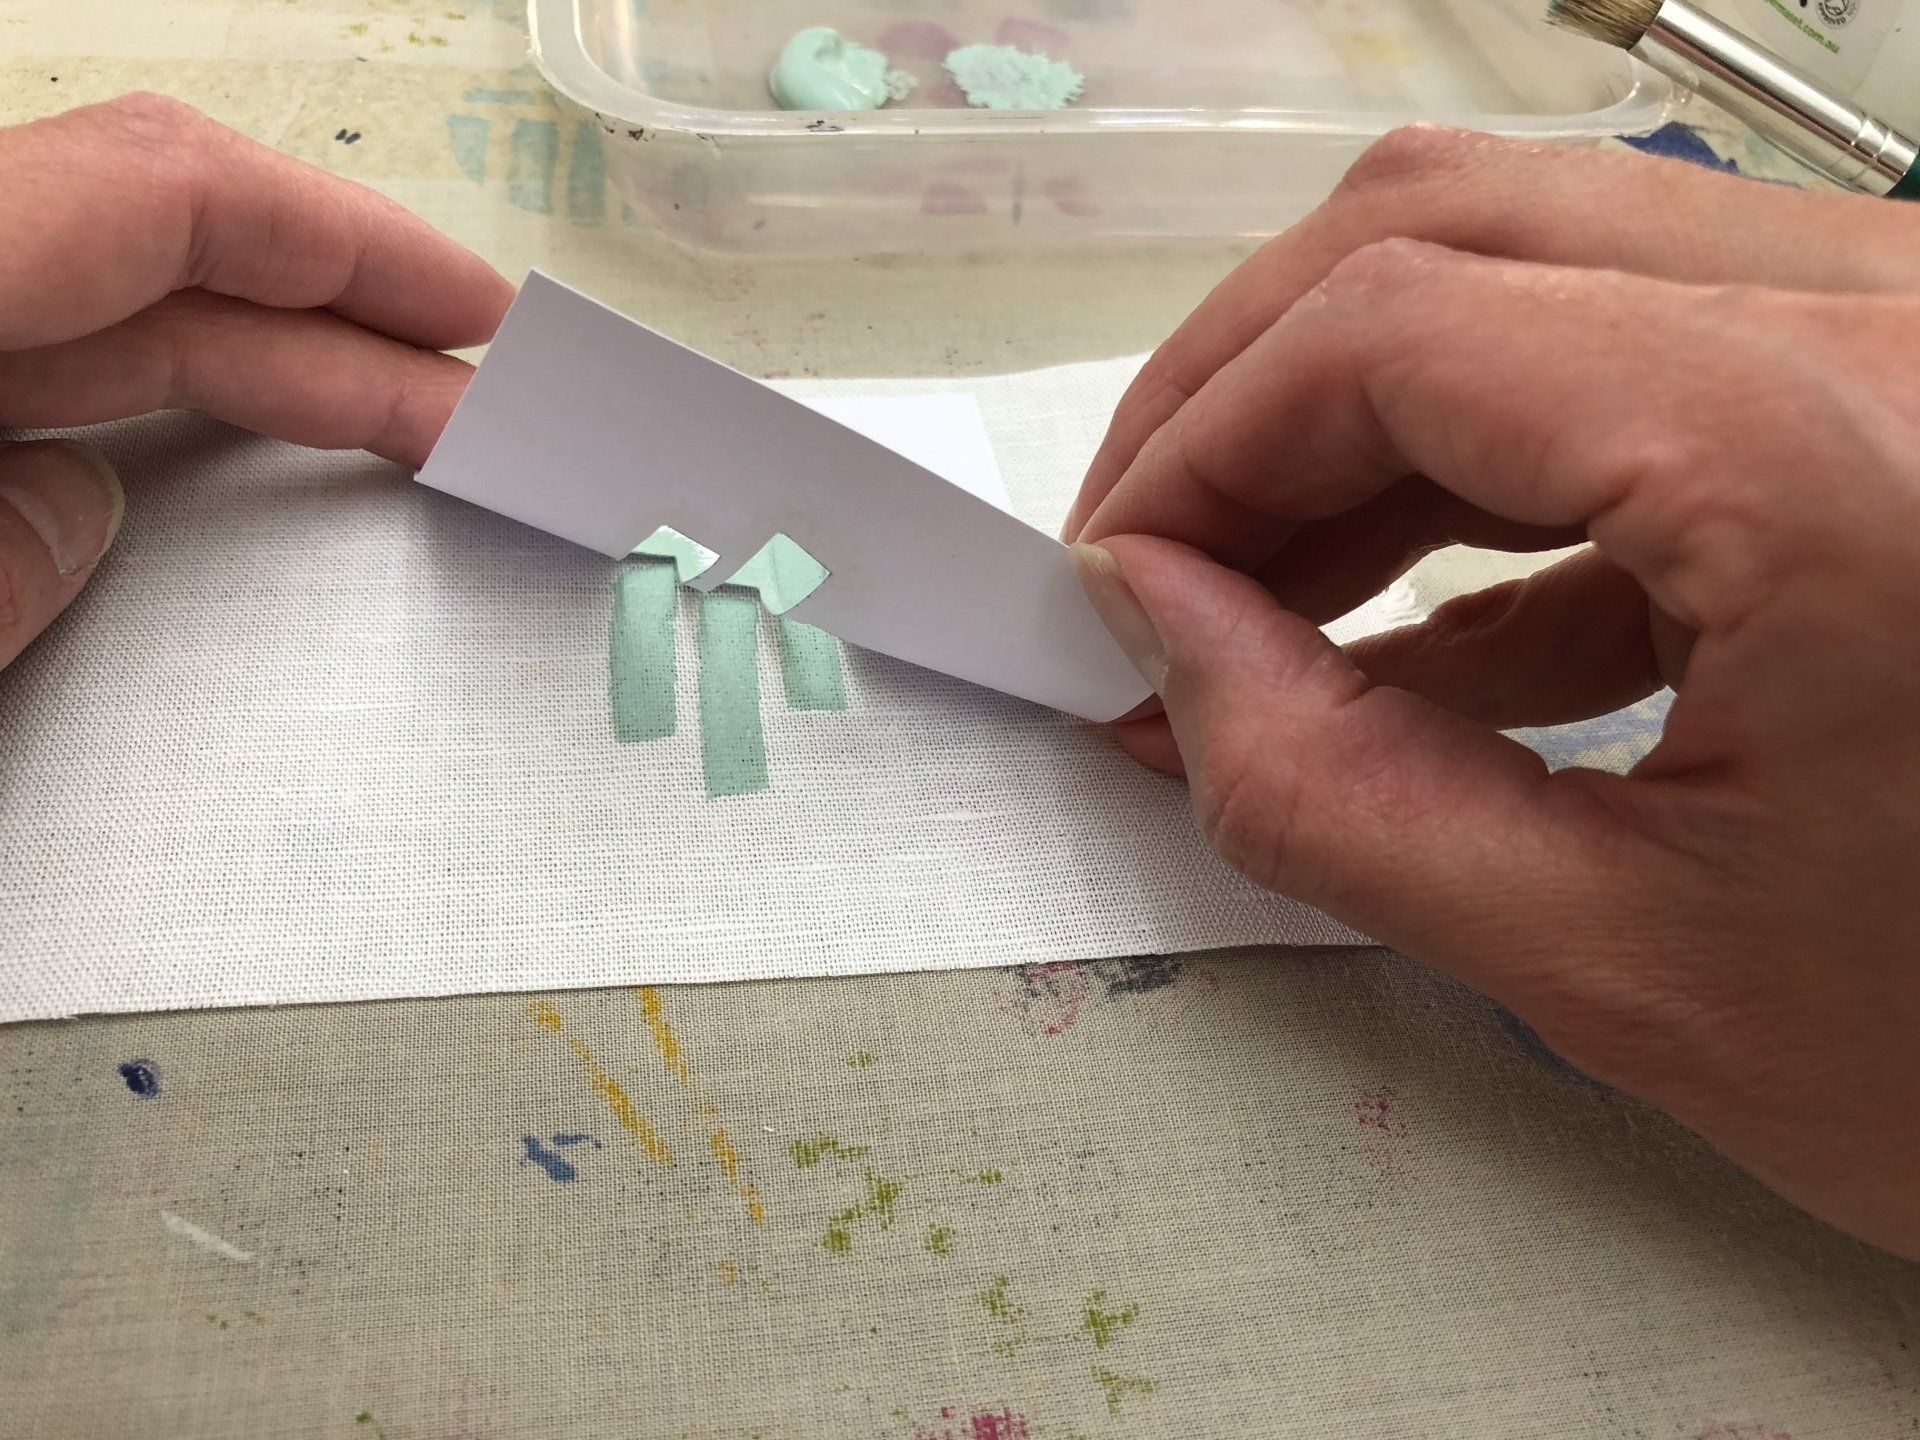
Keeping your brush vertical throughout, dab your brush onto the fabric and work across the stencil to fill the area you are printing. If the area looks patchy, go over it again lightly to achieve a solid block of colour. Put your brush down and carefully lift the stencil from the fabric to reveal your first print.
There may be small imperfections with you print, embrace them, you are hand printing and inconsistencies are part of the beauty of this process.
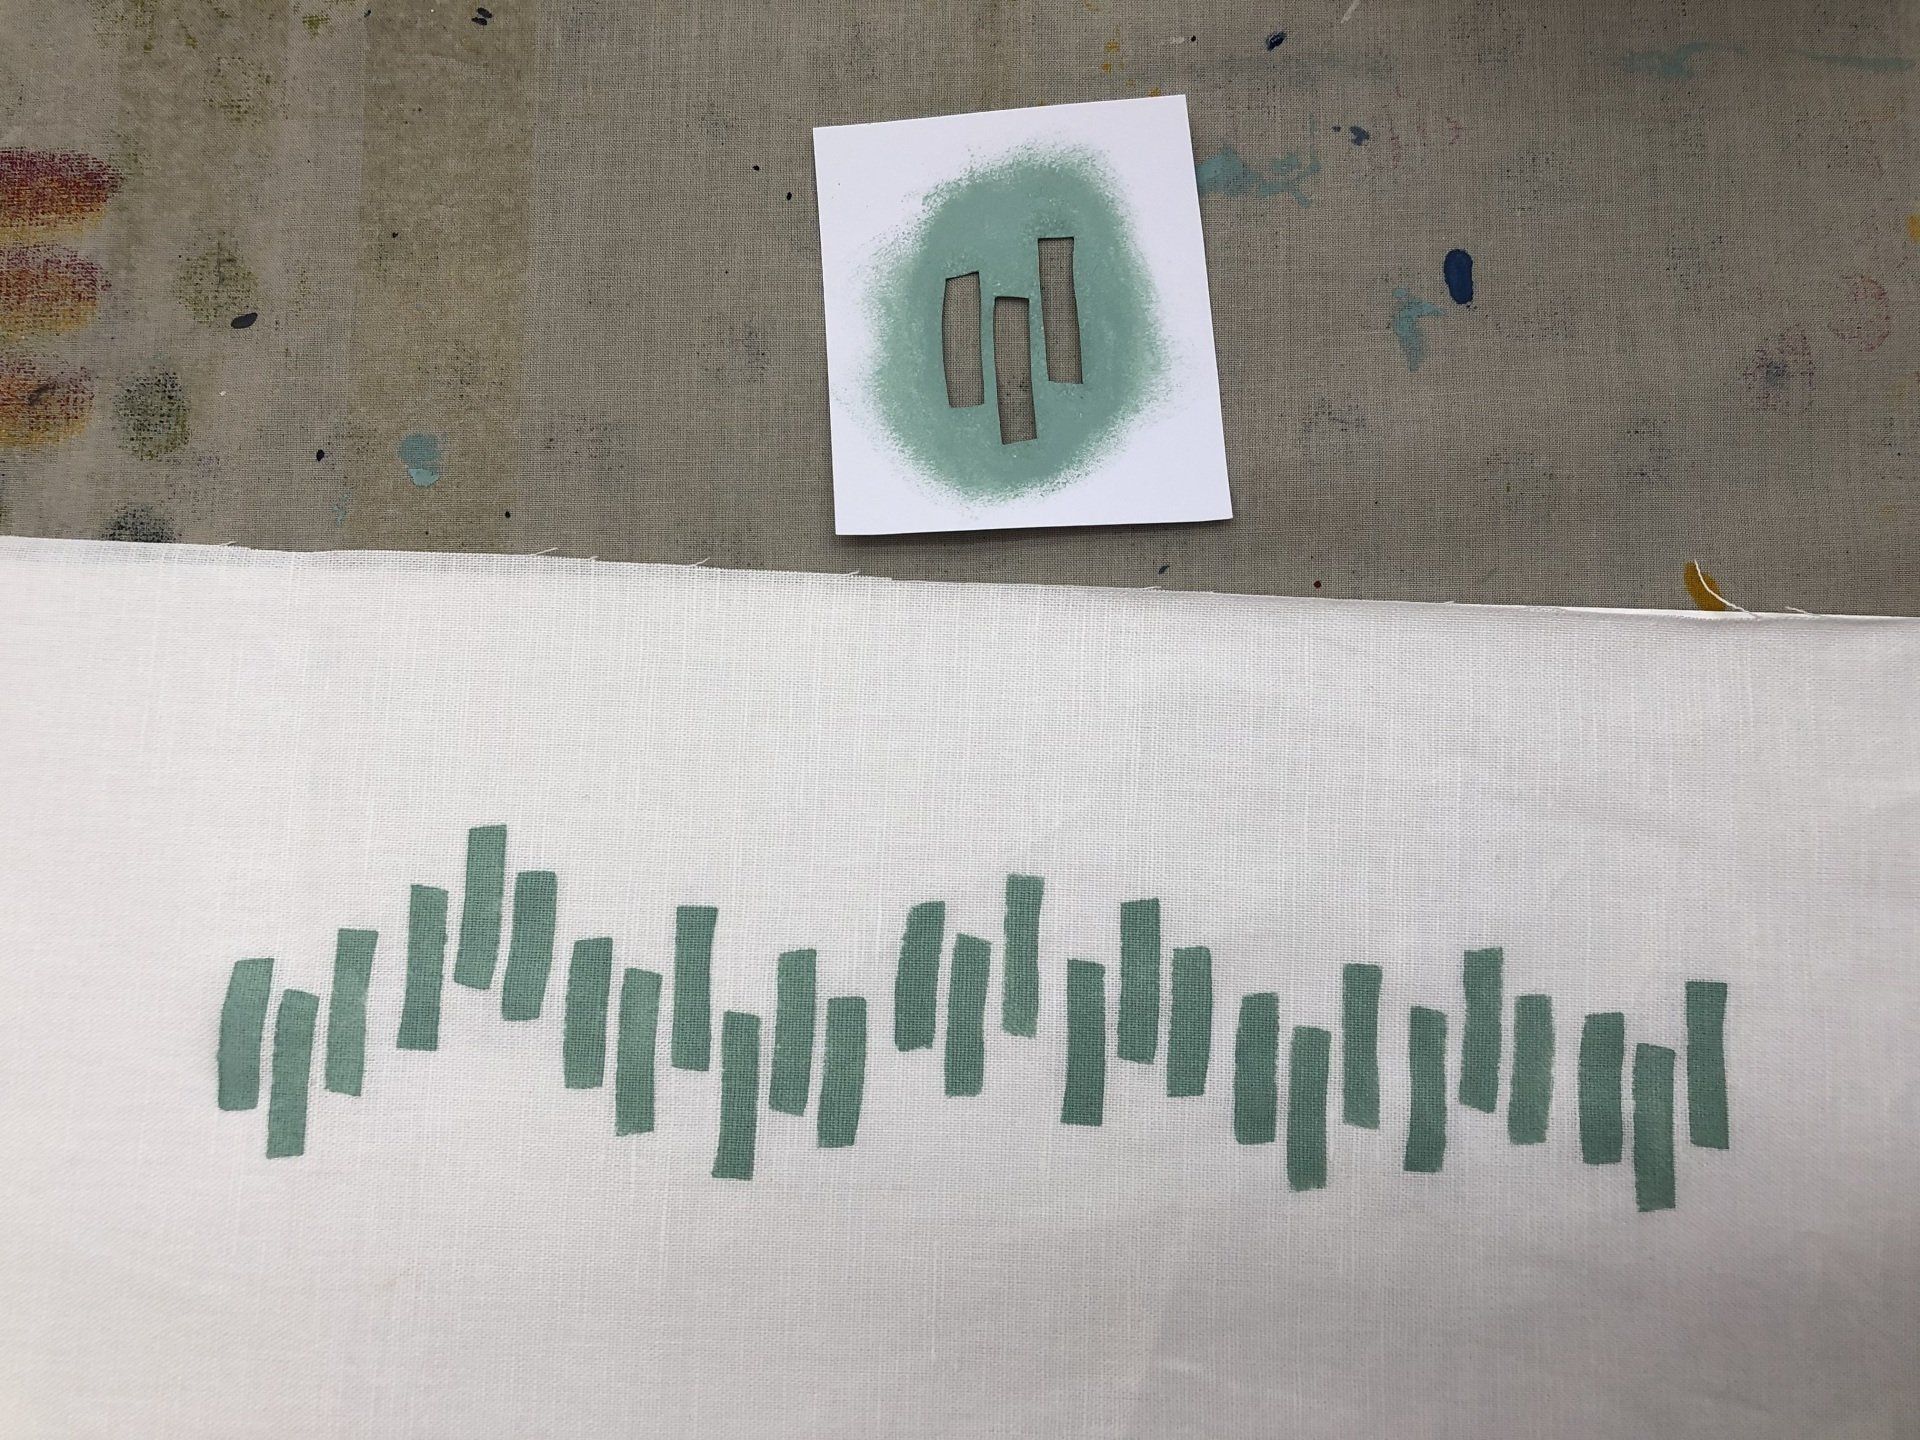
After some practice you can start to print onto your chosen fabric. Think about the repeat you'd like to create. If you're a beginner try to avoid a harsh geometric repeat as anything that is slightly 'off' will look like an error.
Aim to keep your repeat flowing and organic.
If you want to have a 'random' repeat, these are actually harder to do than you think and need a little planning. I'll show you an example later on.

If you'd like to use a sponge, the process is very similar. Hold your sponge so that you have good control over where you are applying ink and pressure. Dab into the ink as before and even out the spread by dabbing onto a clean area of the plate.
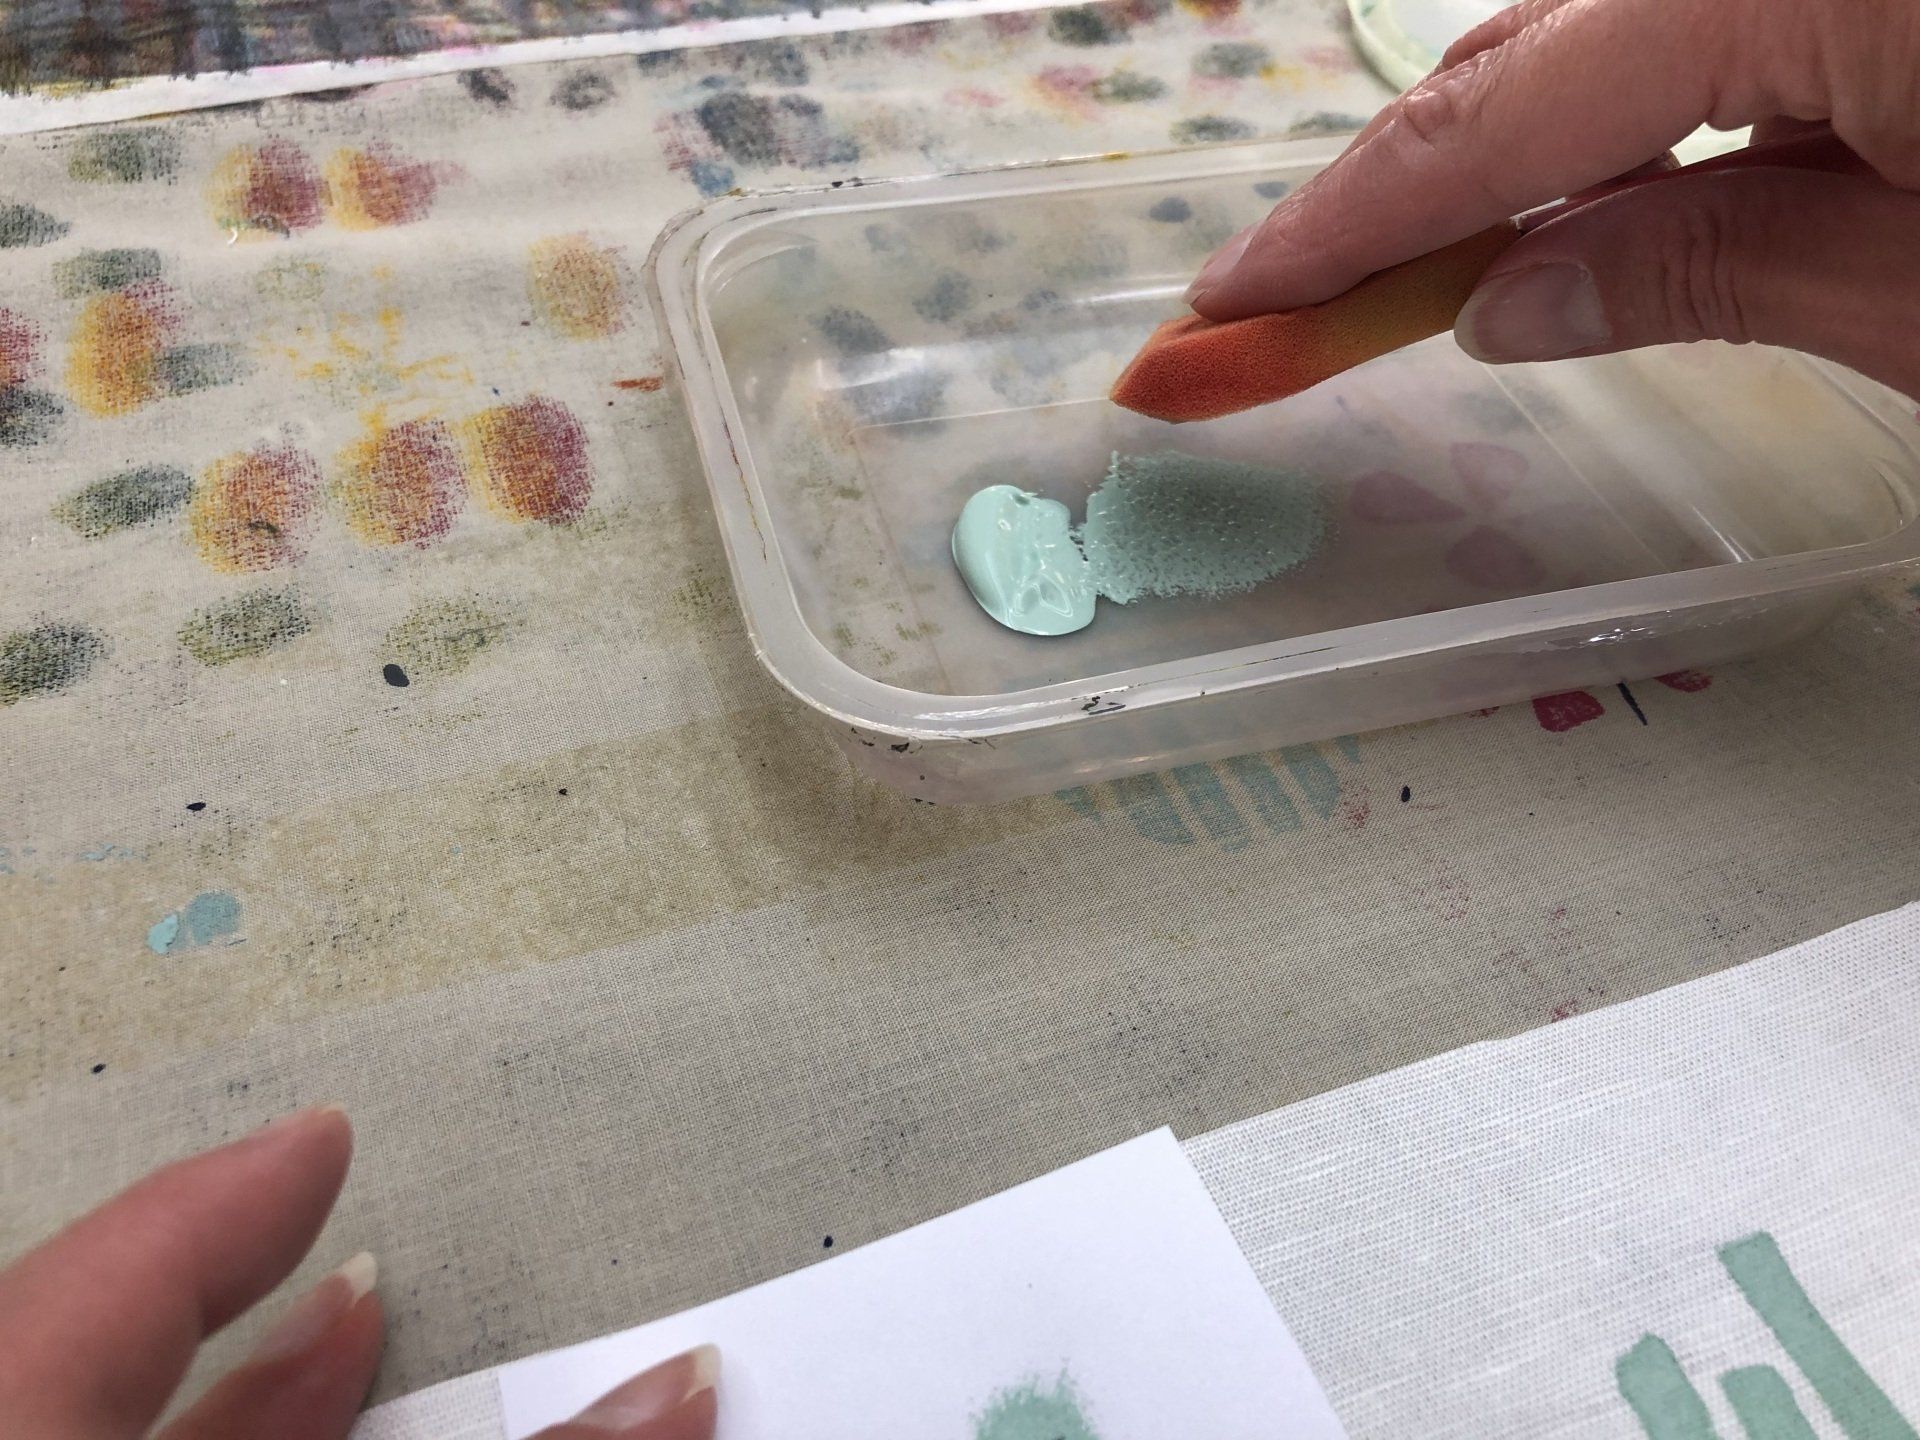
Apply the ink onto the fabric with the stencil in the same way as before, not using too much ink and building up layers of ink to achieve a solid block of colour.
Alternatively leave a space and print every other section and come back and fill the gaps. This is slightly trickier to do as it's harder to visualise where the print will flow to or to allow an accurate space without measuring everything out.
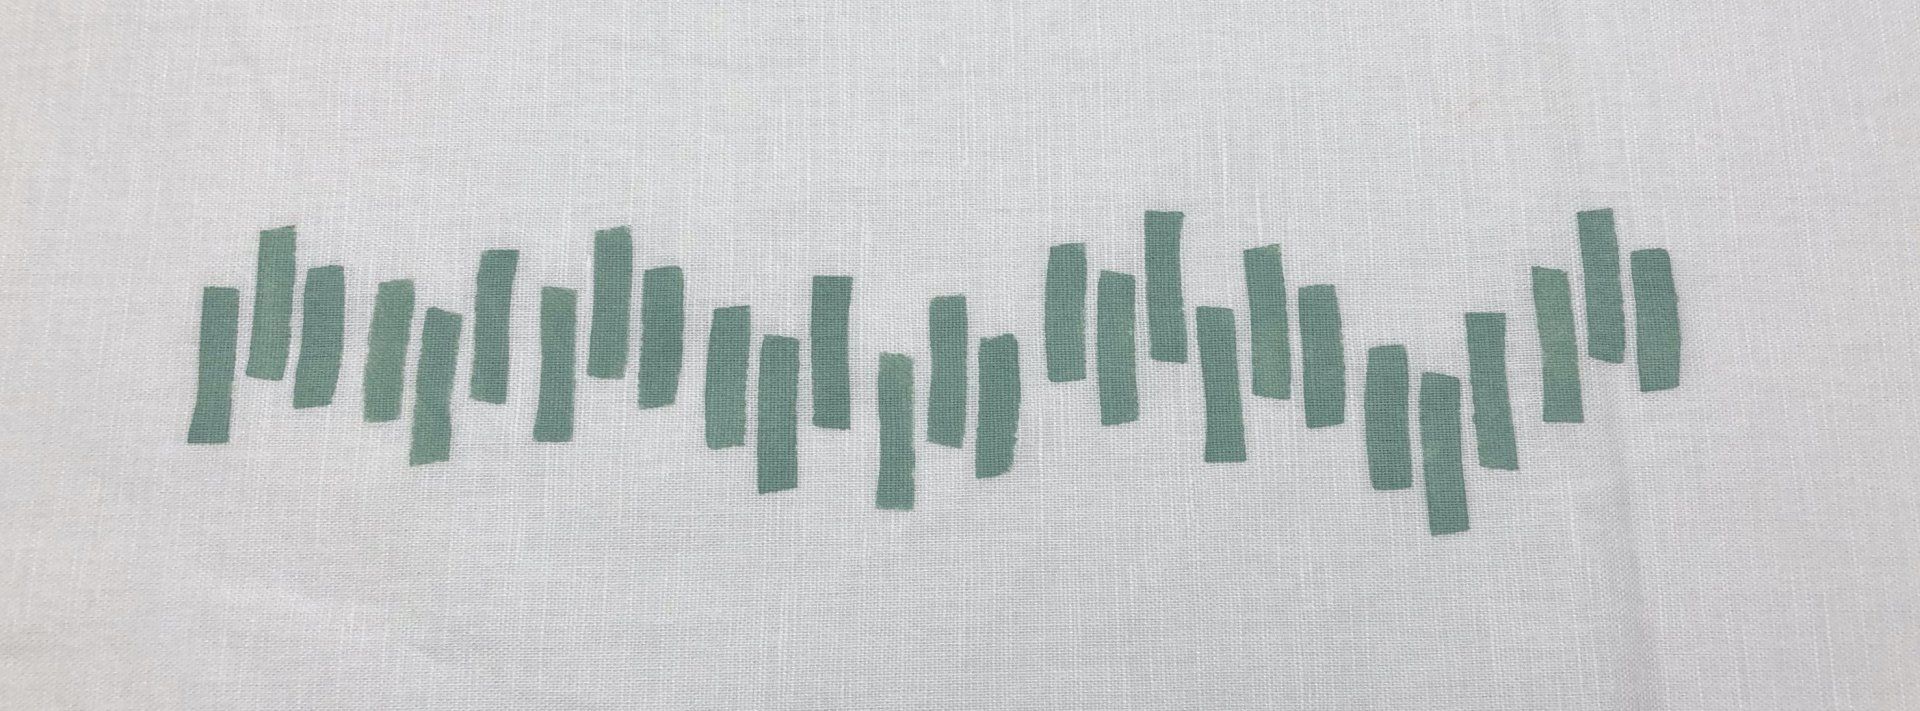
By rotating this stencil 180° with every print, the design below is interesting and has movement to it. By not keeping to a harsh straight line, nothing looks out of place and the overall print has a good flow.
This next example uses a larger sponge and a more open design. The fine midrib of the leaf may seem loose when you're printing, but it sticks down with the ink so carry on as above and trust the process.
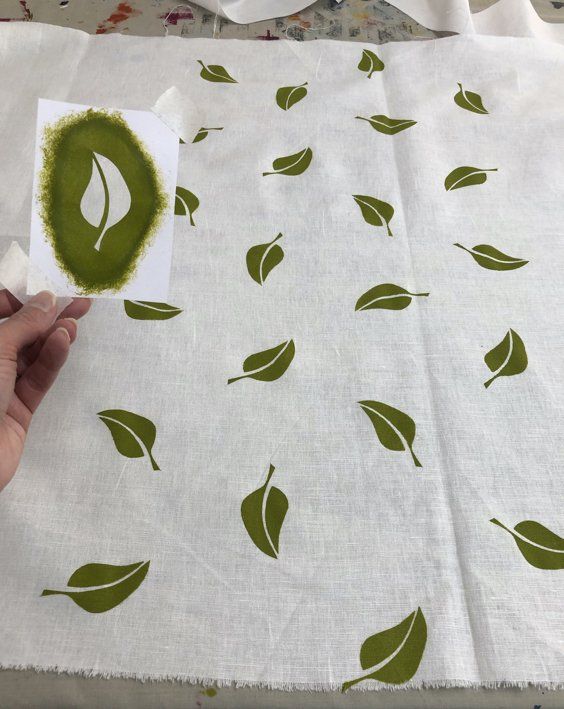
This is a more random looking design but this was planned. To achieve an even coverage of an area, start in one corner of your piece and work outwards in all directions, move your stencil a similar distance each time and if you're rotating the stencil, make sure that you get a balance of directions to keep the design flowing.

Once you have completed your printing wash your brush / sponge in clean water and allow to dry. Leave your fabric to dry completely before heat setting. To heat set follow the instructions on your chosen ink, a hot iron is usually sufficient, keep the iron moving so you don't scorch your fabric. You're then ready to use the fabric in your project.
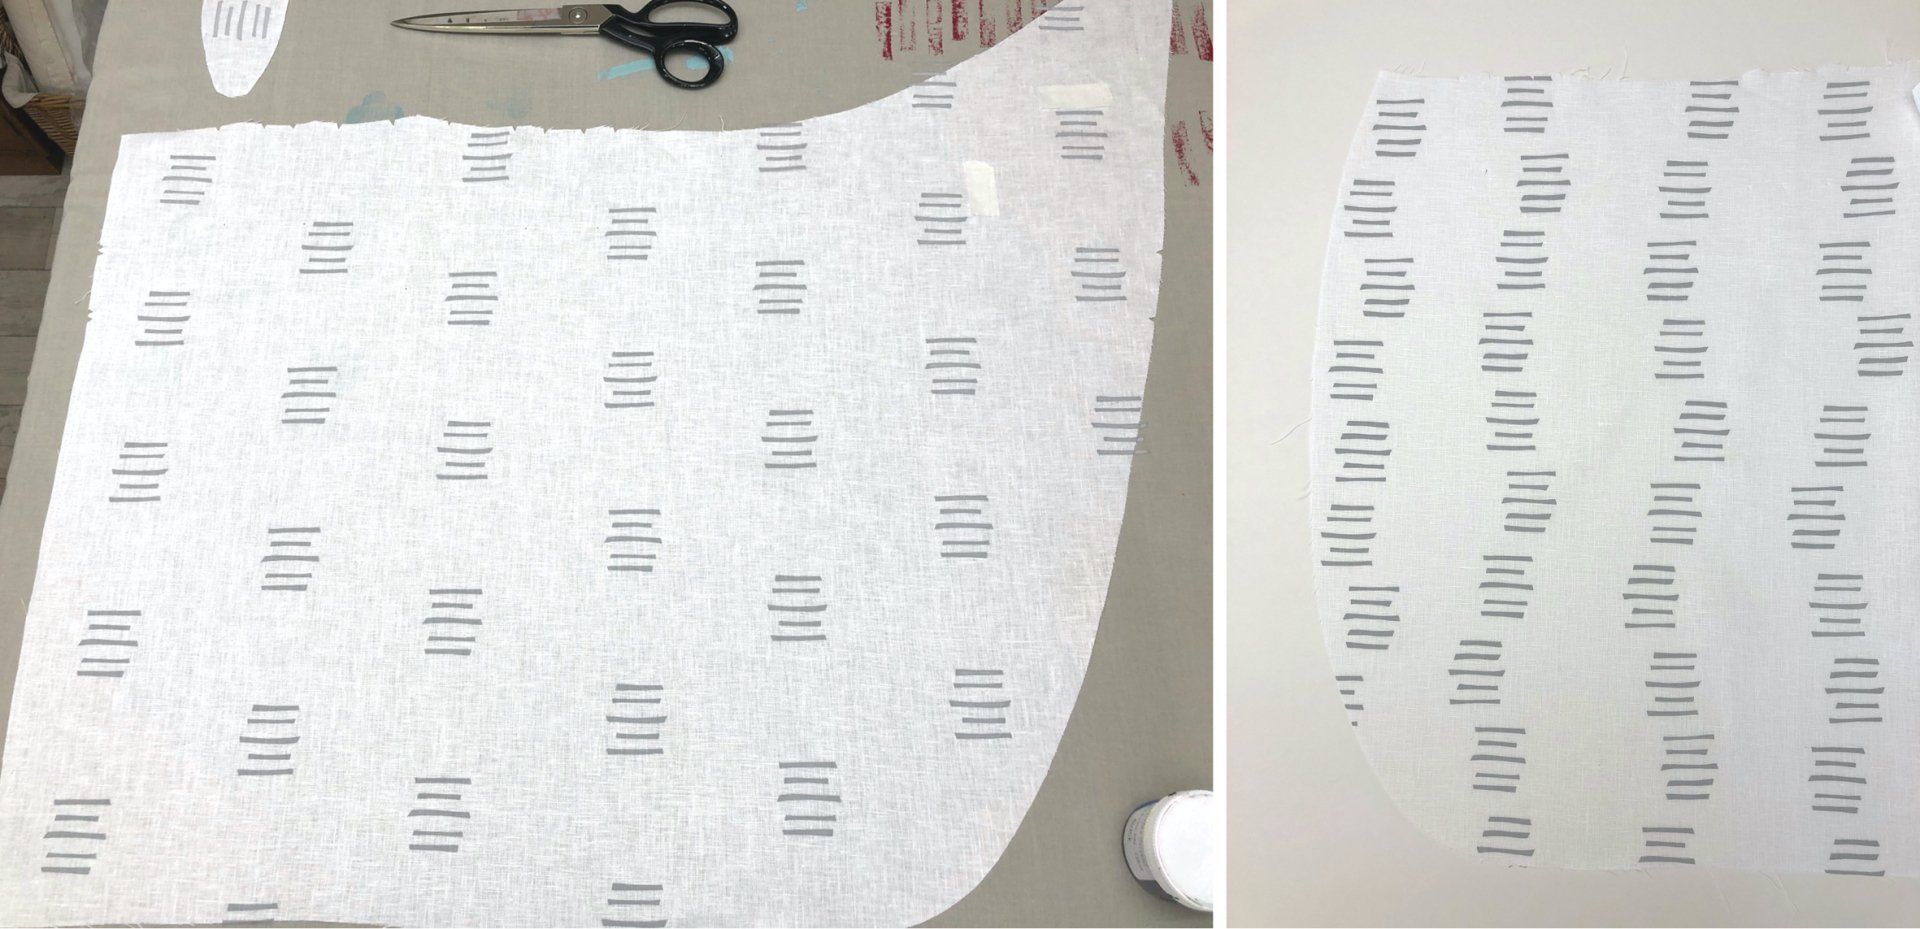
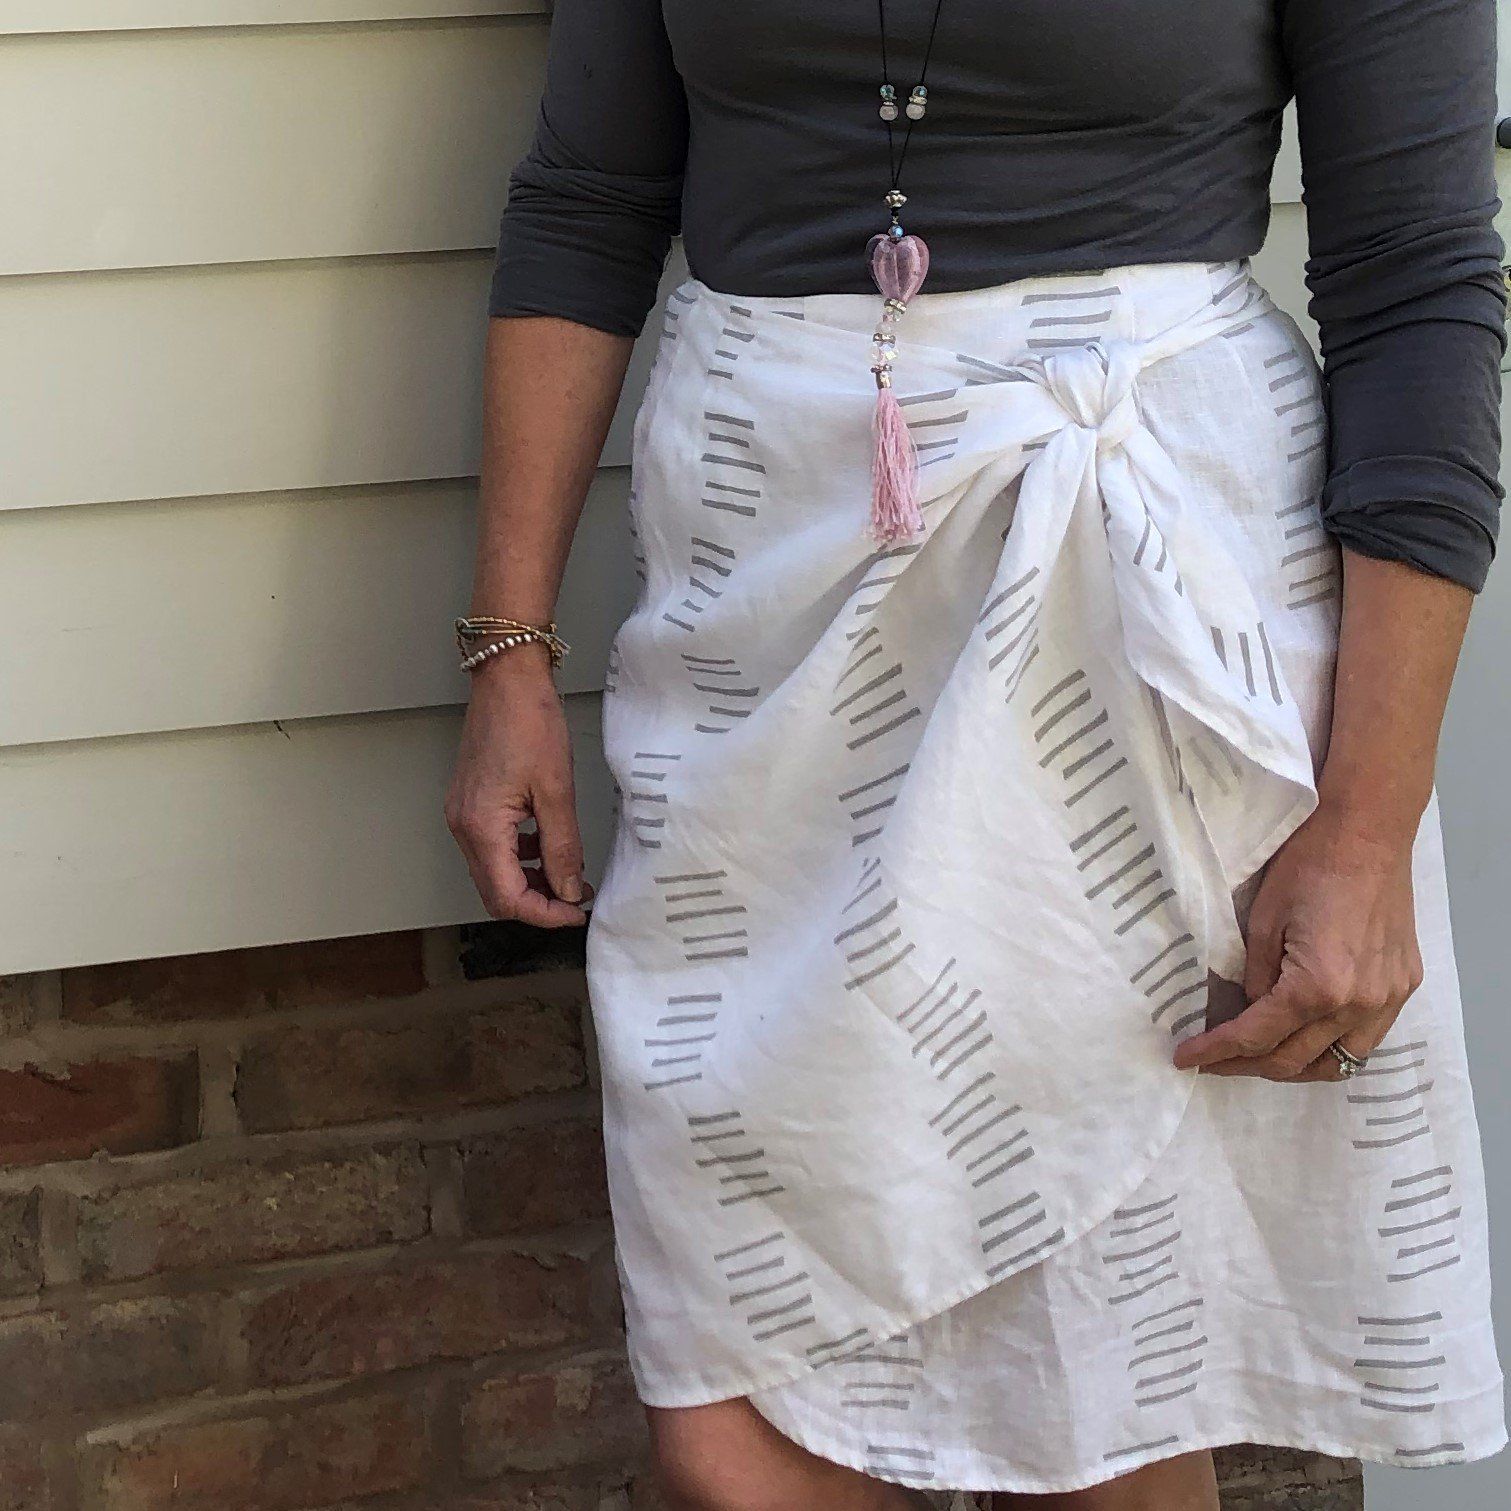
Once you're confident with printing, plan the design for your garment, here are a couple of process shots from when I printed on the Lydia skirt by Cut Couture to give you an idea of how I created the repeat.
Keep it simple, consider the shape of the garment and where it will sit on your body. You probably don't want a print to draw attention to anywhere personal on your body, keep this in mind when planning and enjoy creating something truly unique to you.
share with a friend

This simple quilt has a lot of impact and suits those who favour a pared back style.
The 'pod' shapes have all been hand appliquéd on as I love to hand stitch, but if you prefer to machine appliqué, go ahead and adapt the design to suit your chosen method of working.
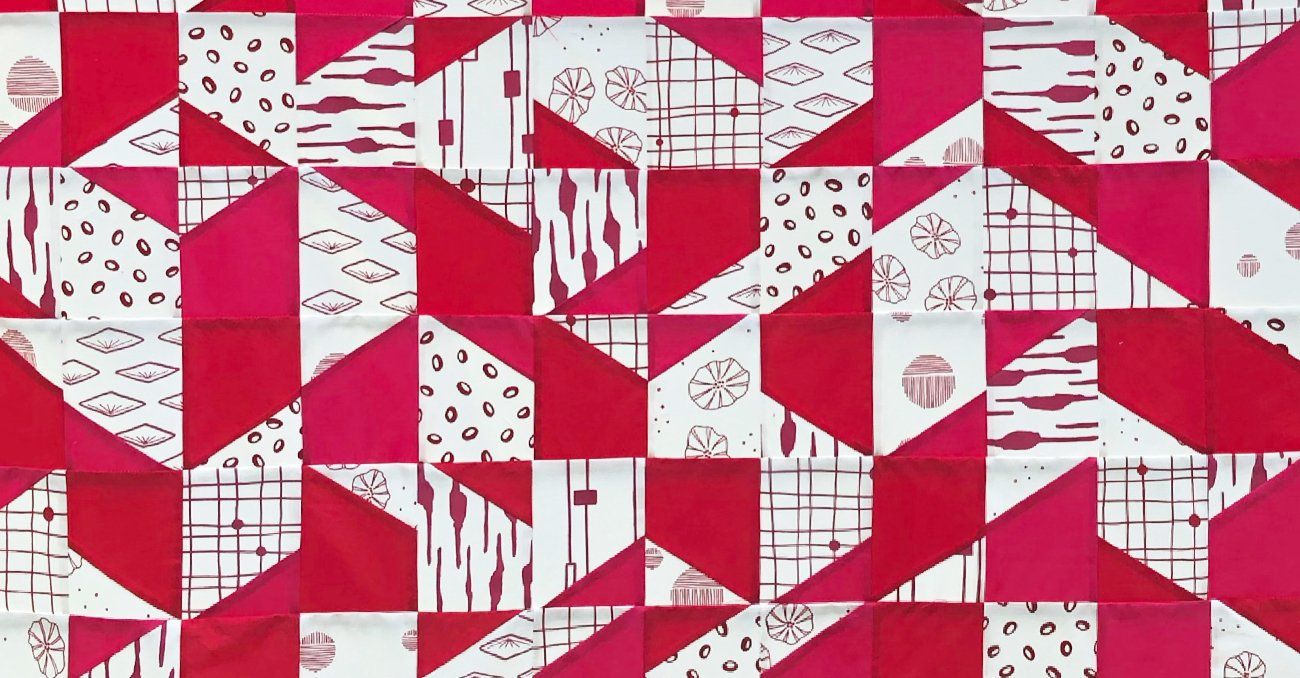
In this Free Turorial I'll show you how to make this simple, eye catching quilt with minimal waste.
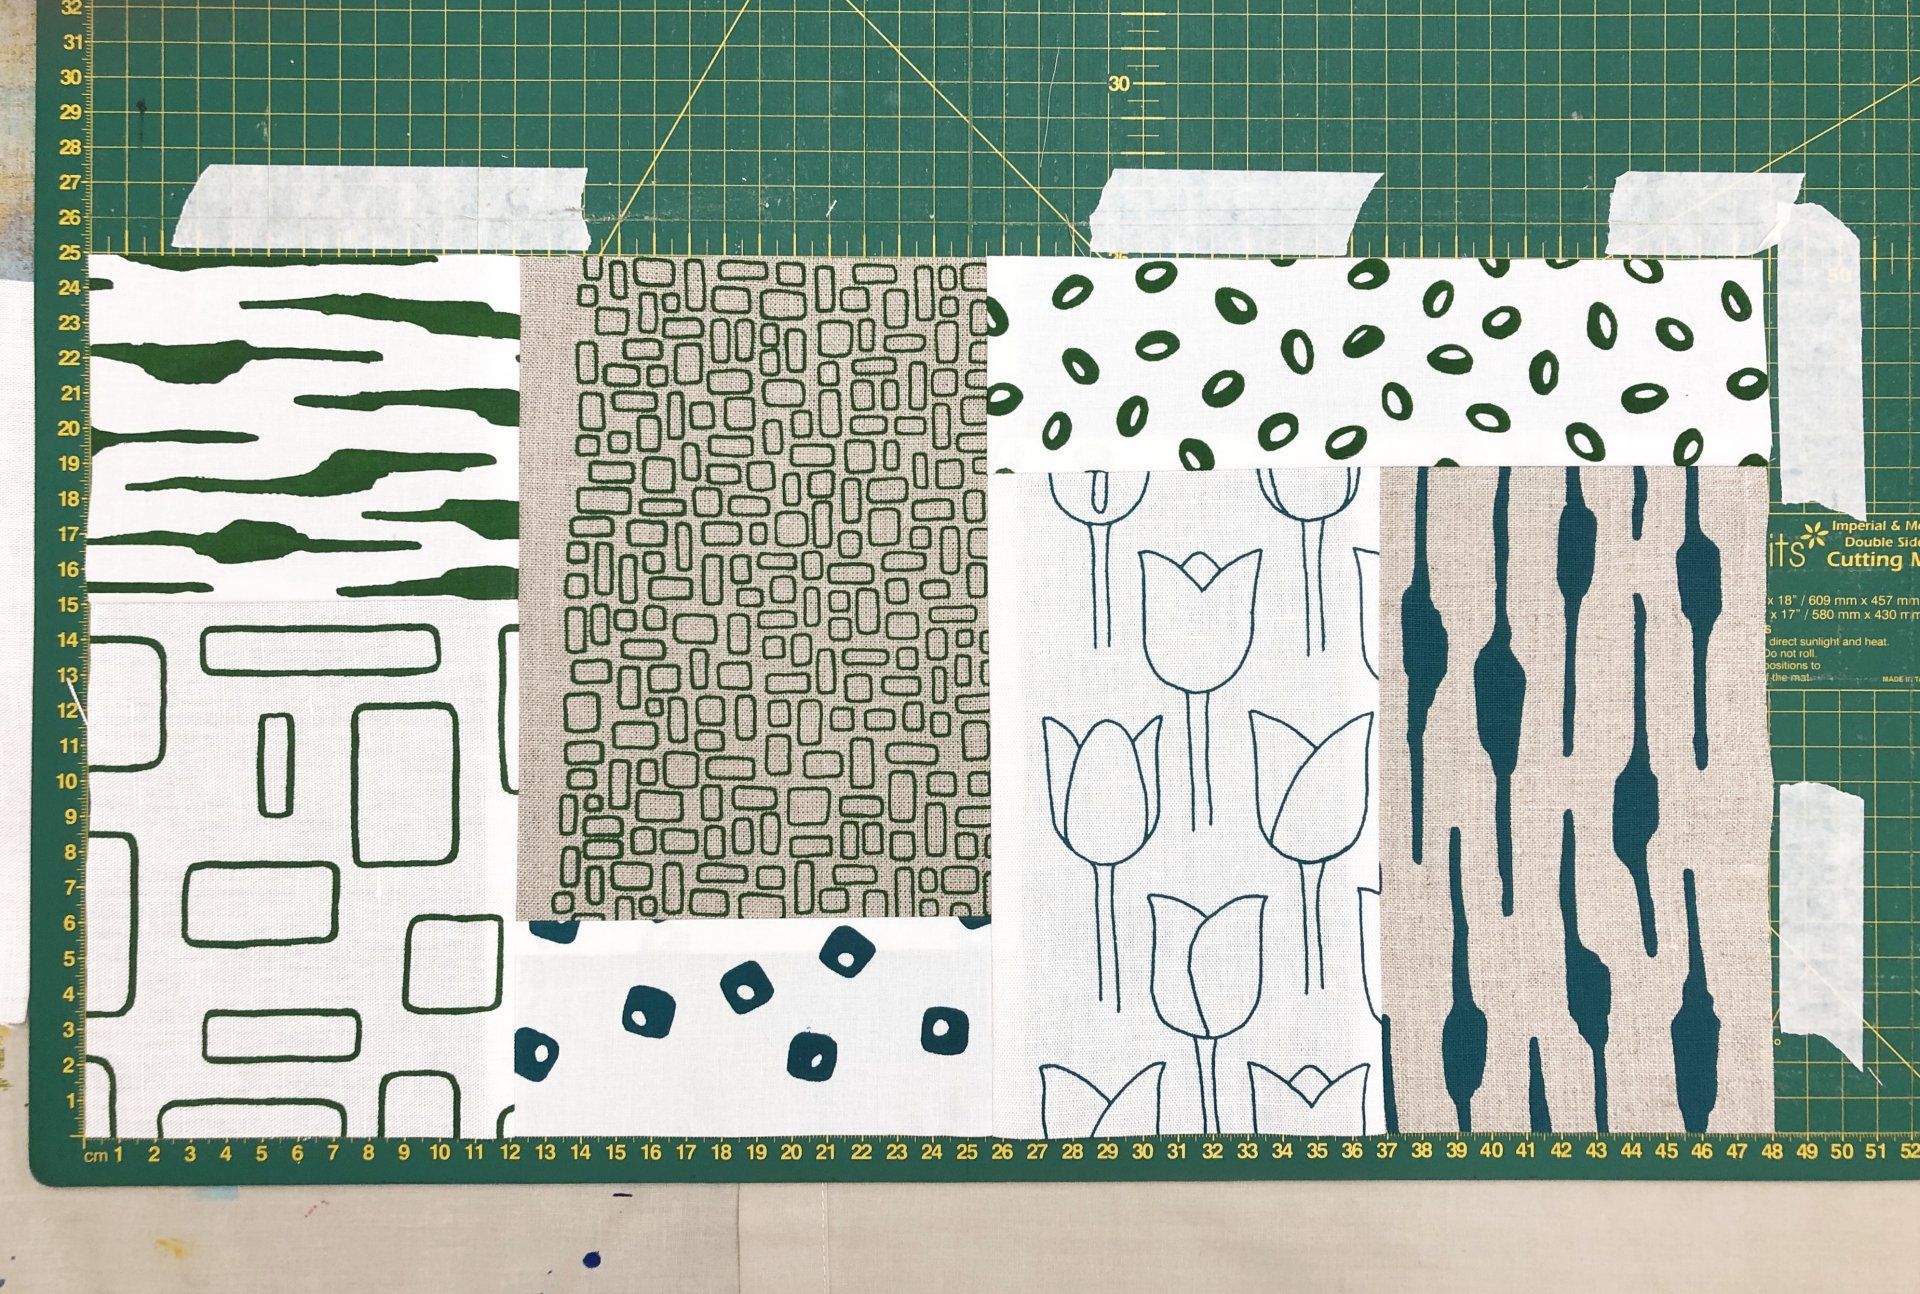
I'm often asked how to patchwork fabrics together to a specific size, such as when you may be making a purse / bag / Fabric Bucket etc. Using a solid piece of fabric is always an option, but it's more interesting to piece together your favourite fabrics to make your finished item more personal to you. I've put together this guide to help you, I often work in an improvisational style, as I like to play around with pattern and scale until I'm happy with the finished composition. * This tutorial does assume you know how to cut and trim fabrics with a cutting mat, acrylic ruler and rotary cutter, if you've not used these before, a quick web search will help you out. *
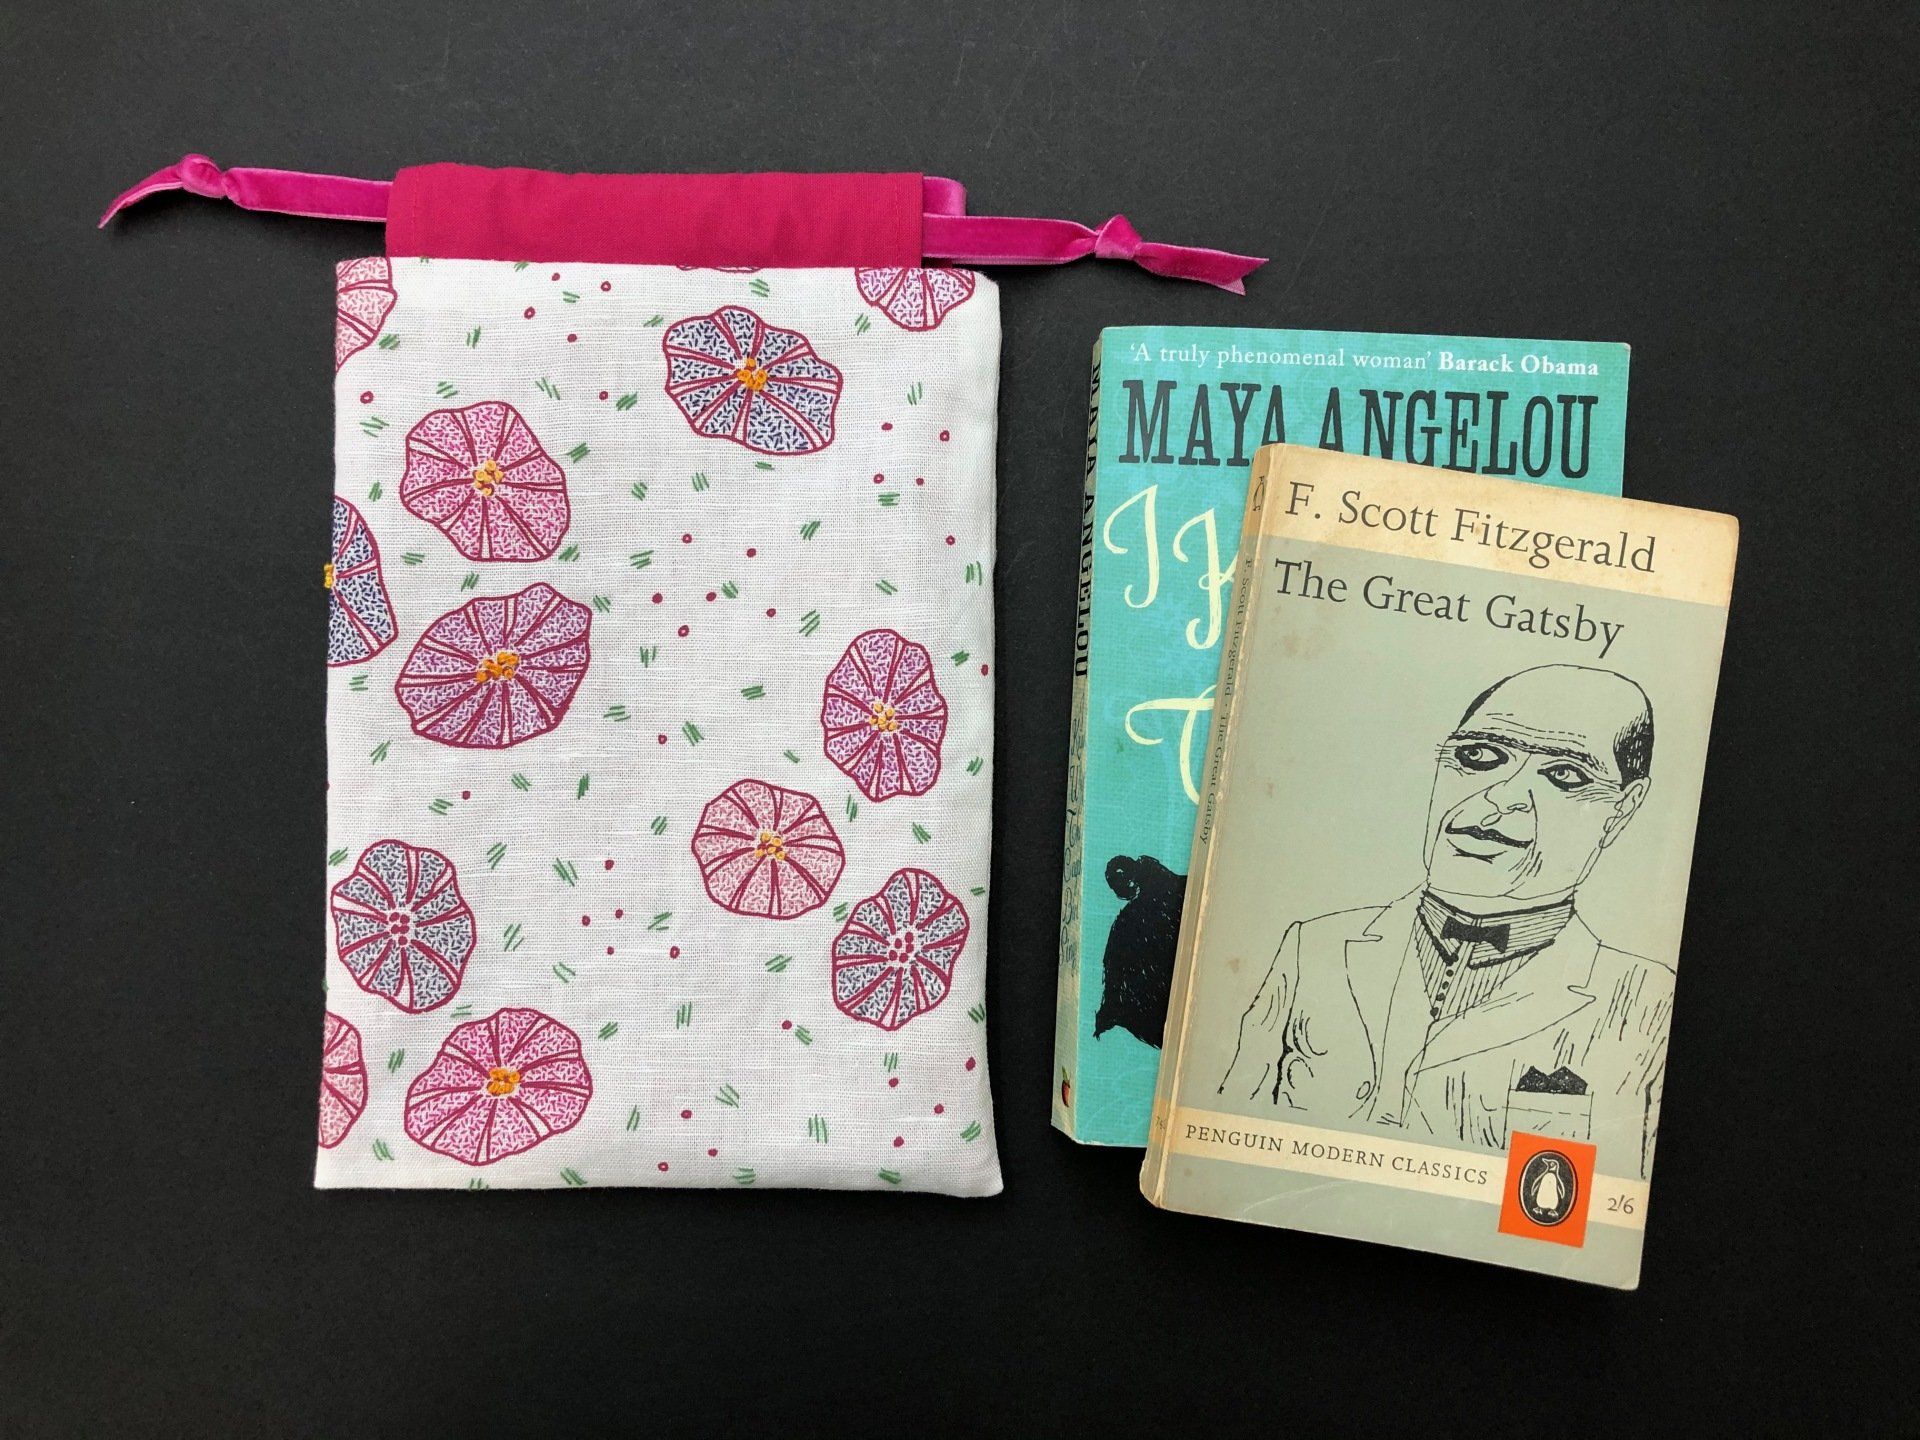
This little drawstring bag is the perfect size for a book or your chargers / a kindle etc. I have made this using half of one of my screen printed panels , you can easily adjust the measurements based on the fabric you have to hand.
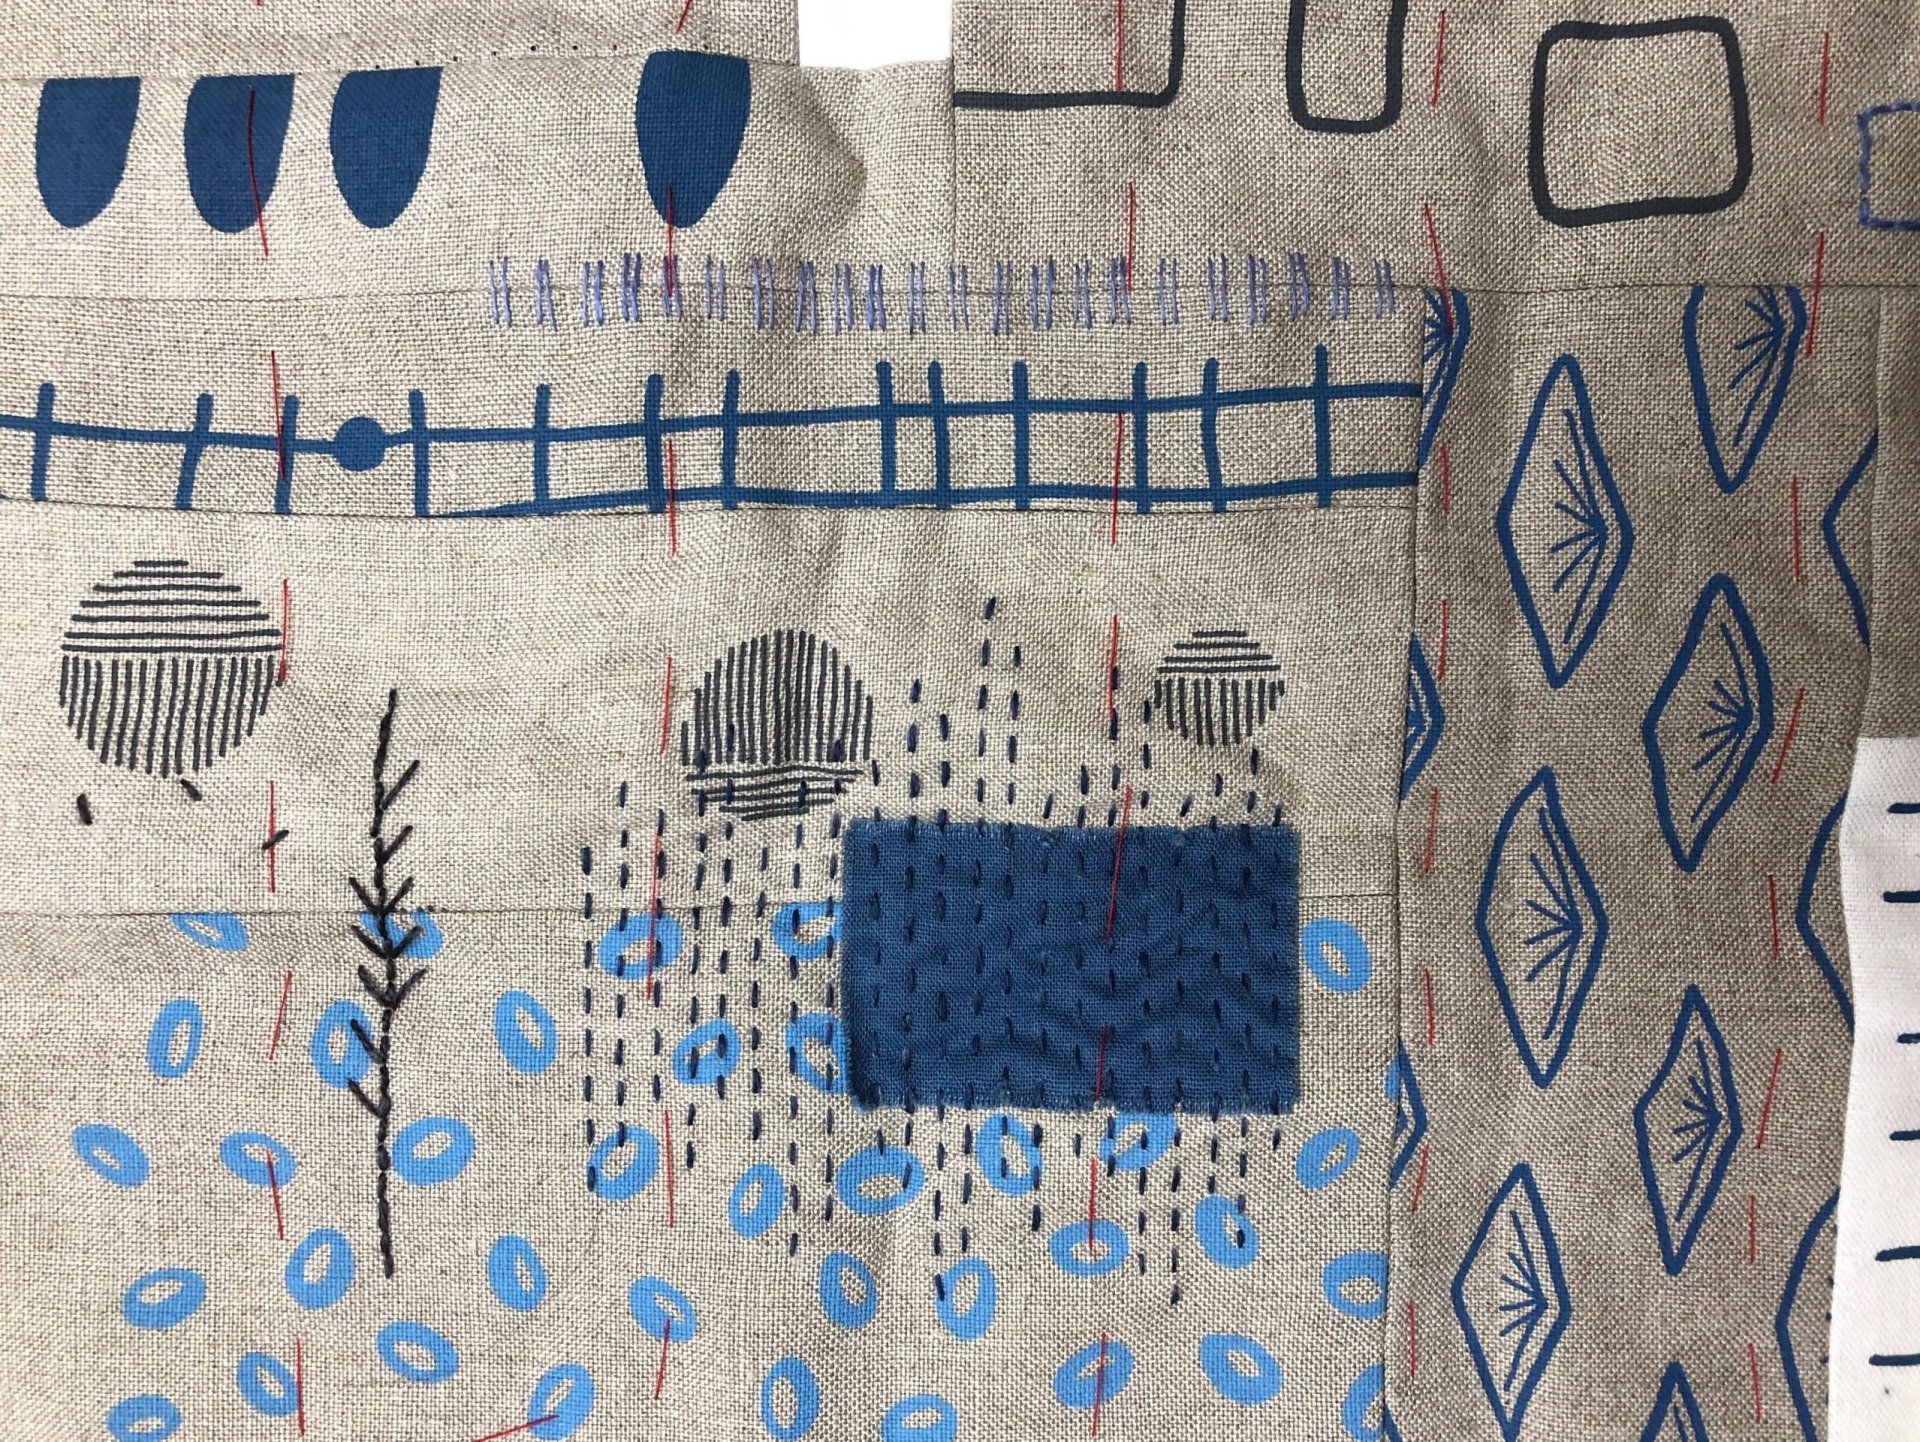
If you've seen my work at a show you'll already know that I'm all about the texture of a project. I love to use natural fibres and threads to build up a range of texture. I thought I'd share some images to inspire you to take the plunge and add some freestyle stitches to your projects. The first thing I usually add to my work is a layer of cotton wadding (batting) to the reverse of the fabric I'm going to be stitching on. I baste this (large tacking stitches) with a brightly coloured thread so it's easy to spot when I'm ready to remove it. You may have some wadding left over from quilt projects, if not try your local quilt shop / online stockist. Then it's time for the fun part, slow stitching and adding your personality to your work. I am no expert at embroidery, I simply draw and sketch with a needle and thread. I'm not looking for perfection and neat regular stitches, for me it's about the process. Enjoying the time it takes to stitch and seeing where the needle takes me. I don't plan my pieces before I start, I choose a couple of threads and dive in. If you're new to embroidery, here are a few tutorials to give you some guidance, Royal School of Needlework Stitchbank , DMC and The Spruce Crafts .
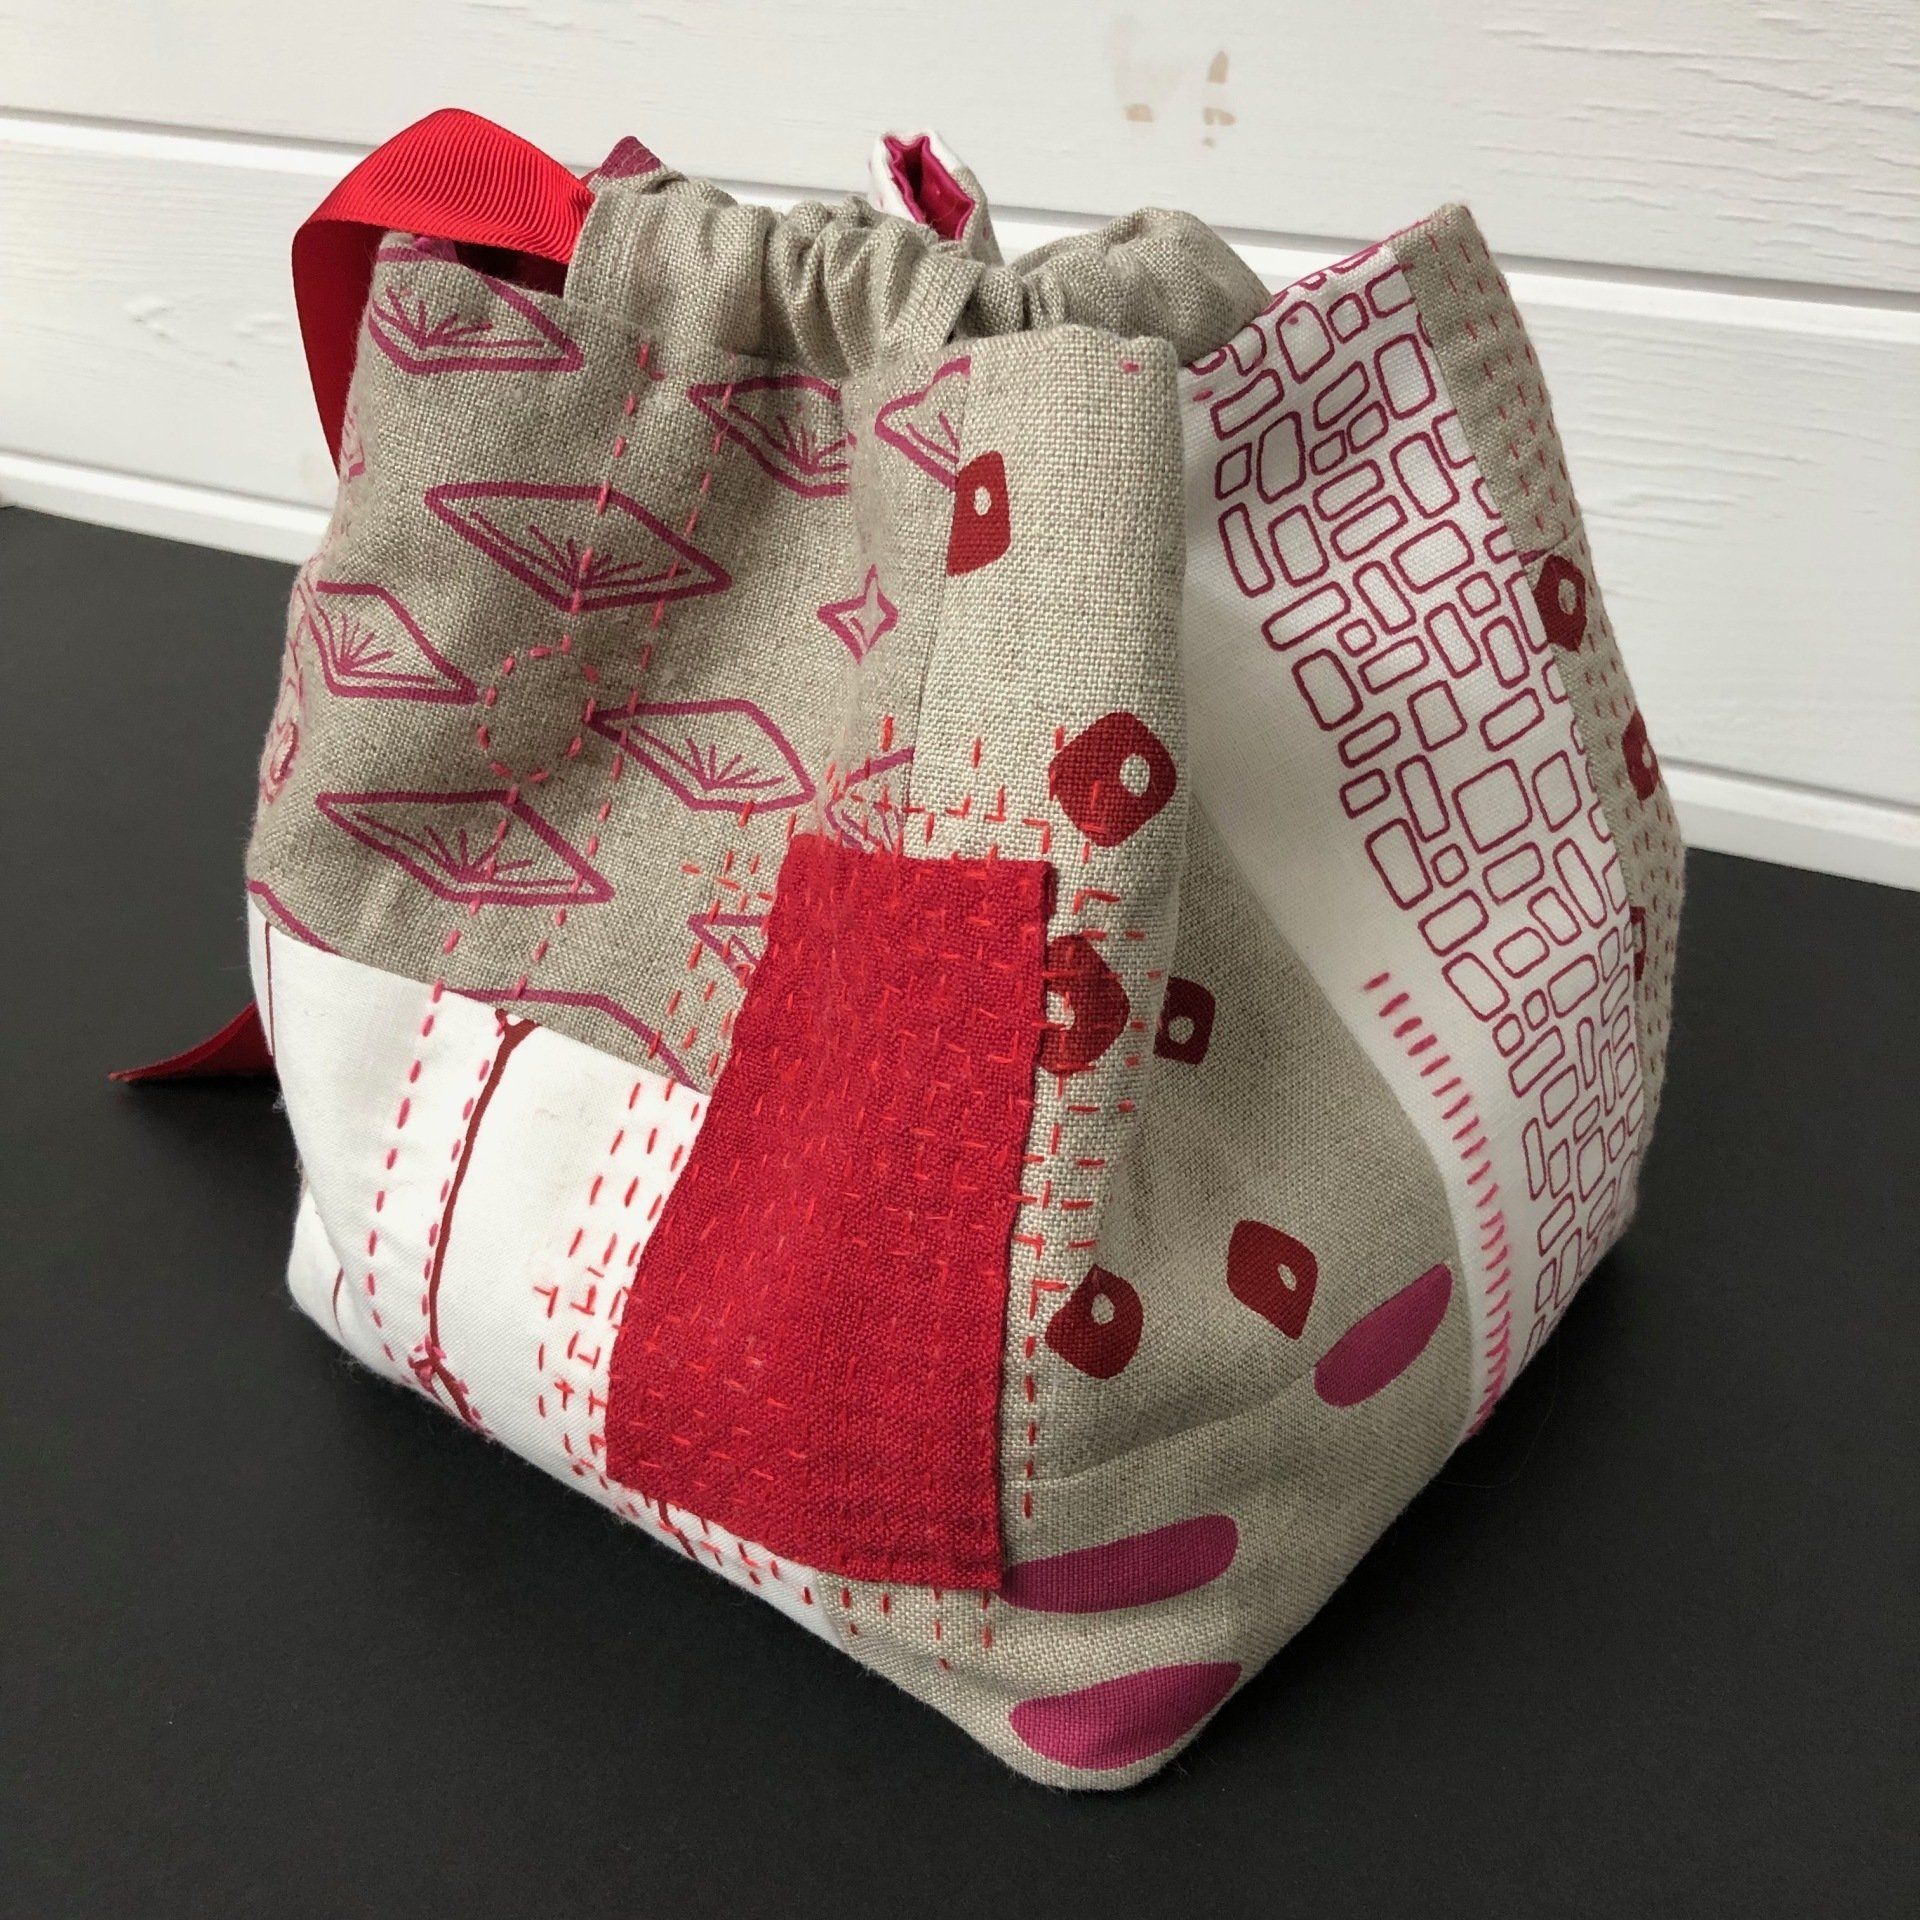
I thought I'd share with you some images of the Japanese Rice Bag I made earlier in the year. This project was one of the most soothing I've worked on as it was such a simple make with beautiful results. I carefully chose my favoutite colours and prints, hand stitched in the garden over the summer and let my mind wander as I stitched freely, waiting to see what came next.
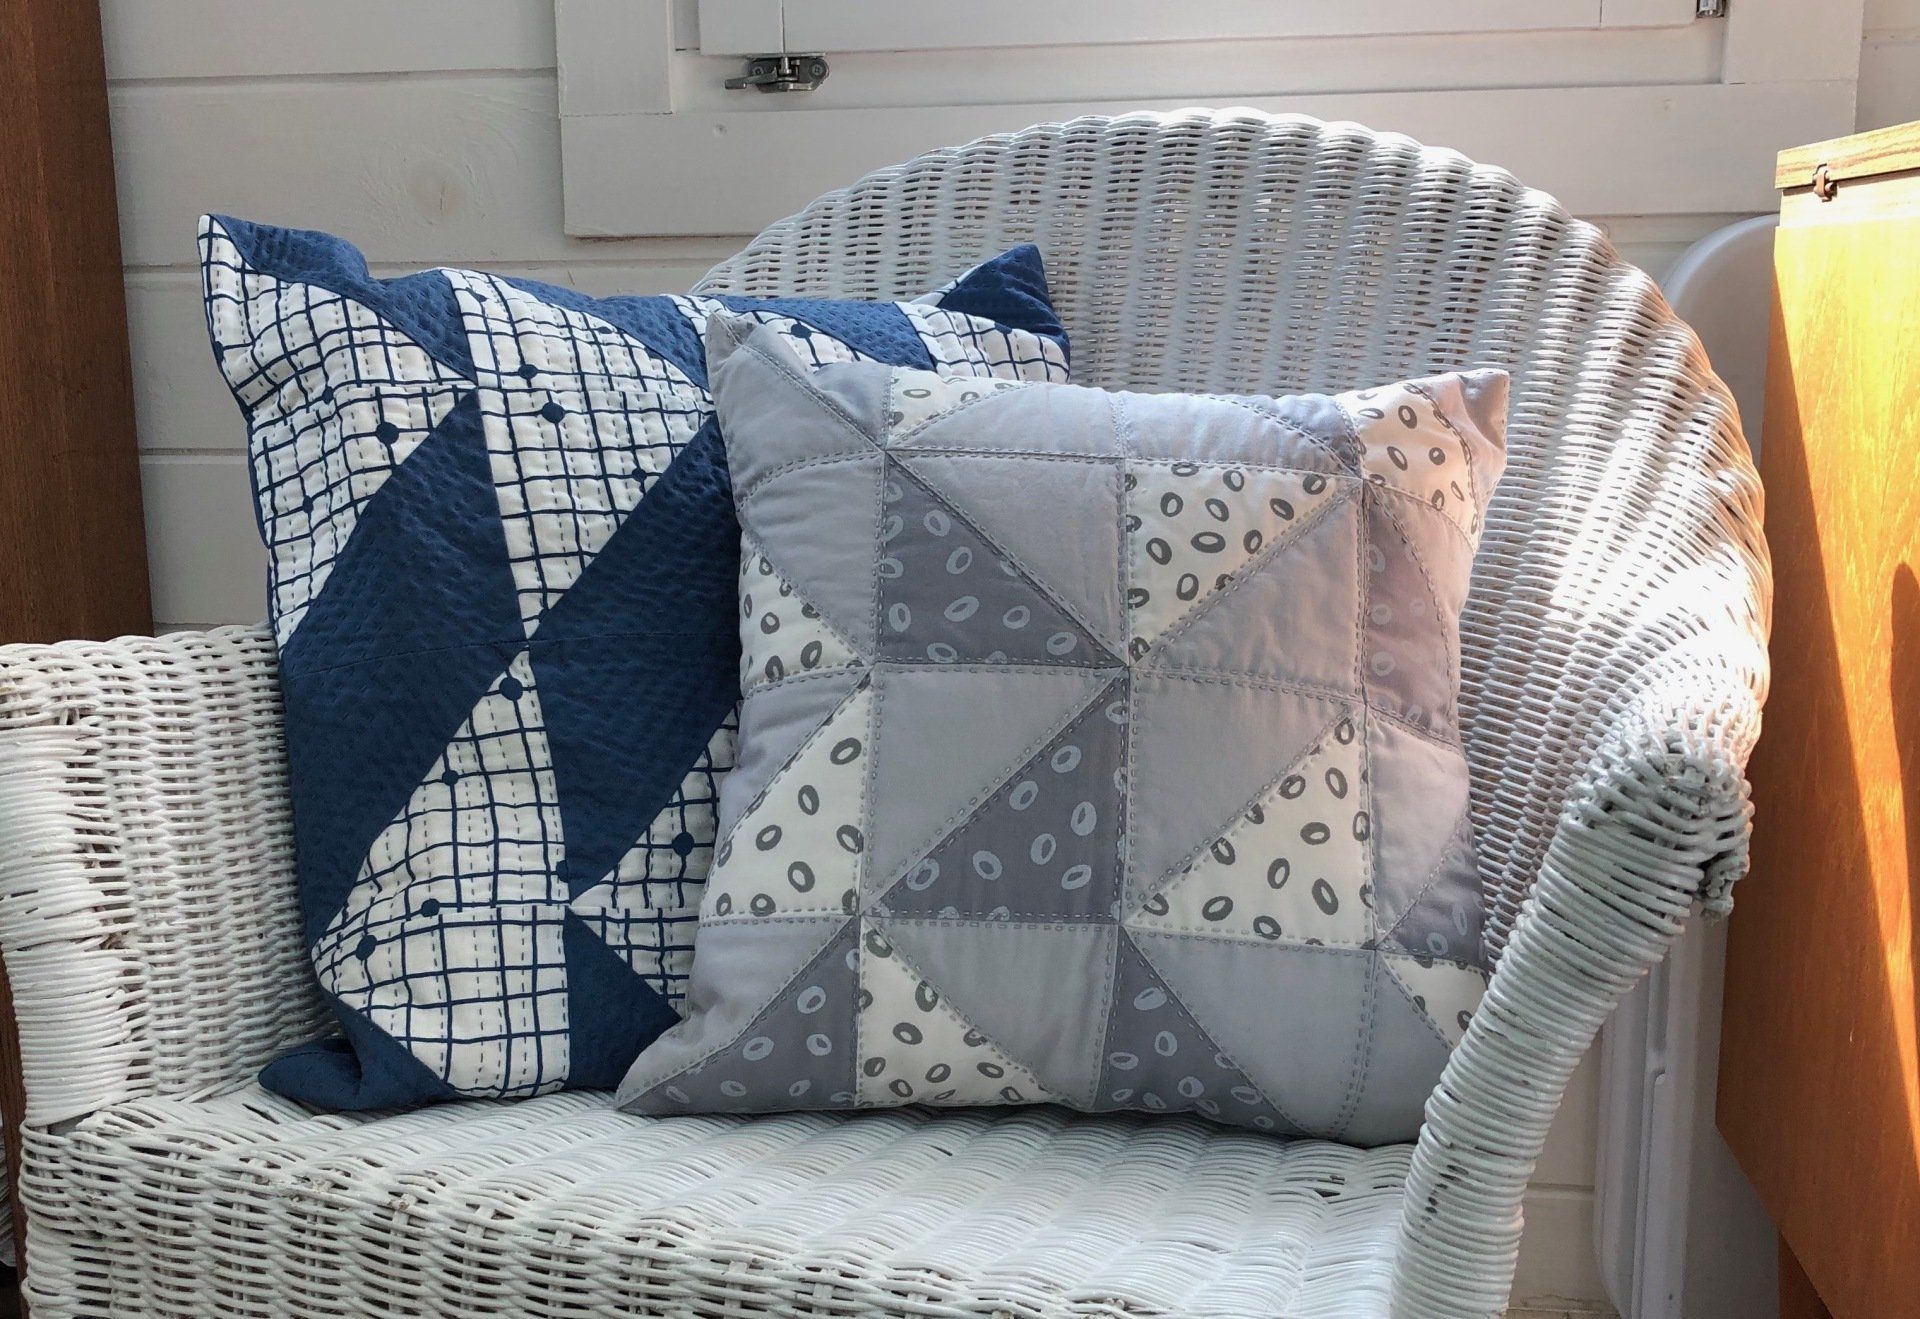
I'm a big fan of simple blocks and shapes when it comes to quilting, I like to see the print of the fabric and I like to add a solid colour to give the eye somewhere to rest and create a strong statement. I've recently finished making 2 cushions using HST's and I thought I'd share my process with you. For both cushions I used fabric panels from my shop . You don't have to use the same prints or colours, choose something that will compliment your home decor.
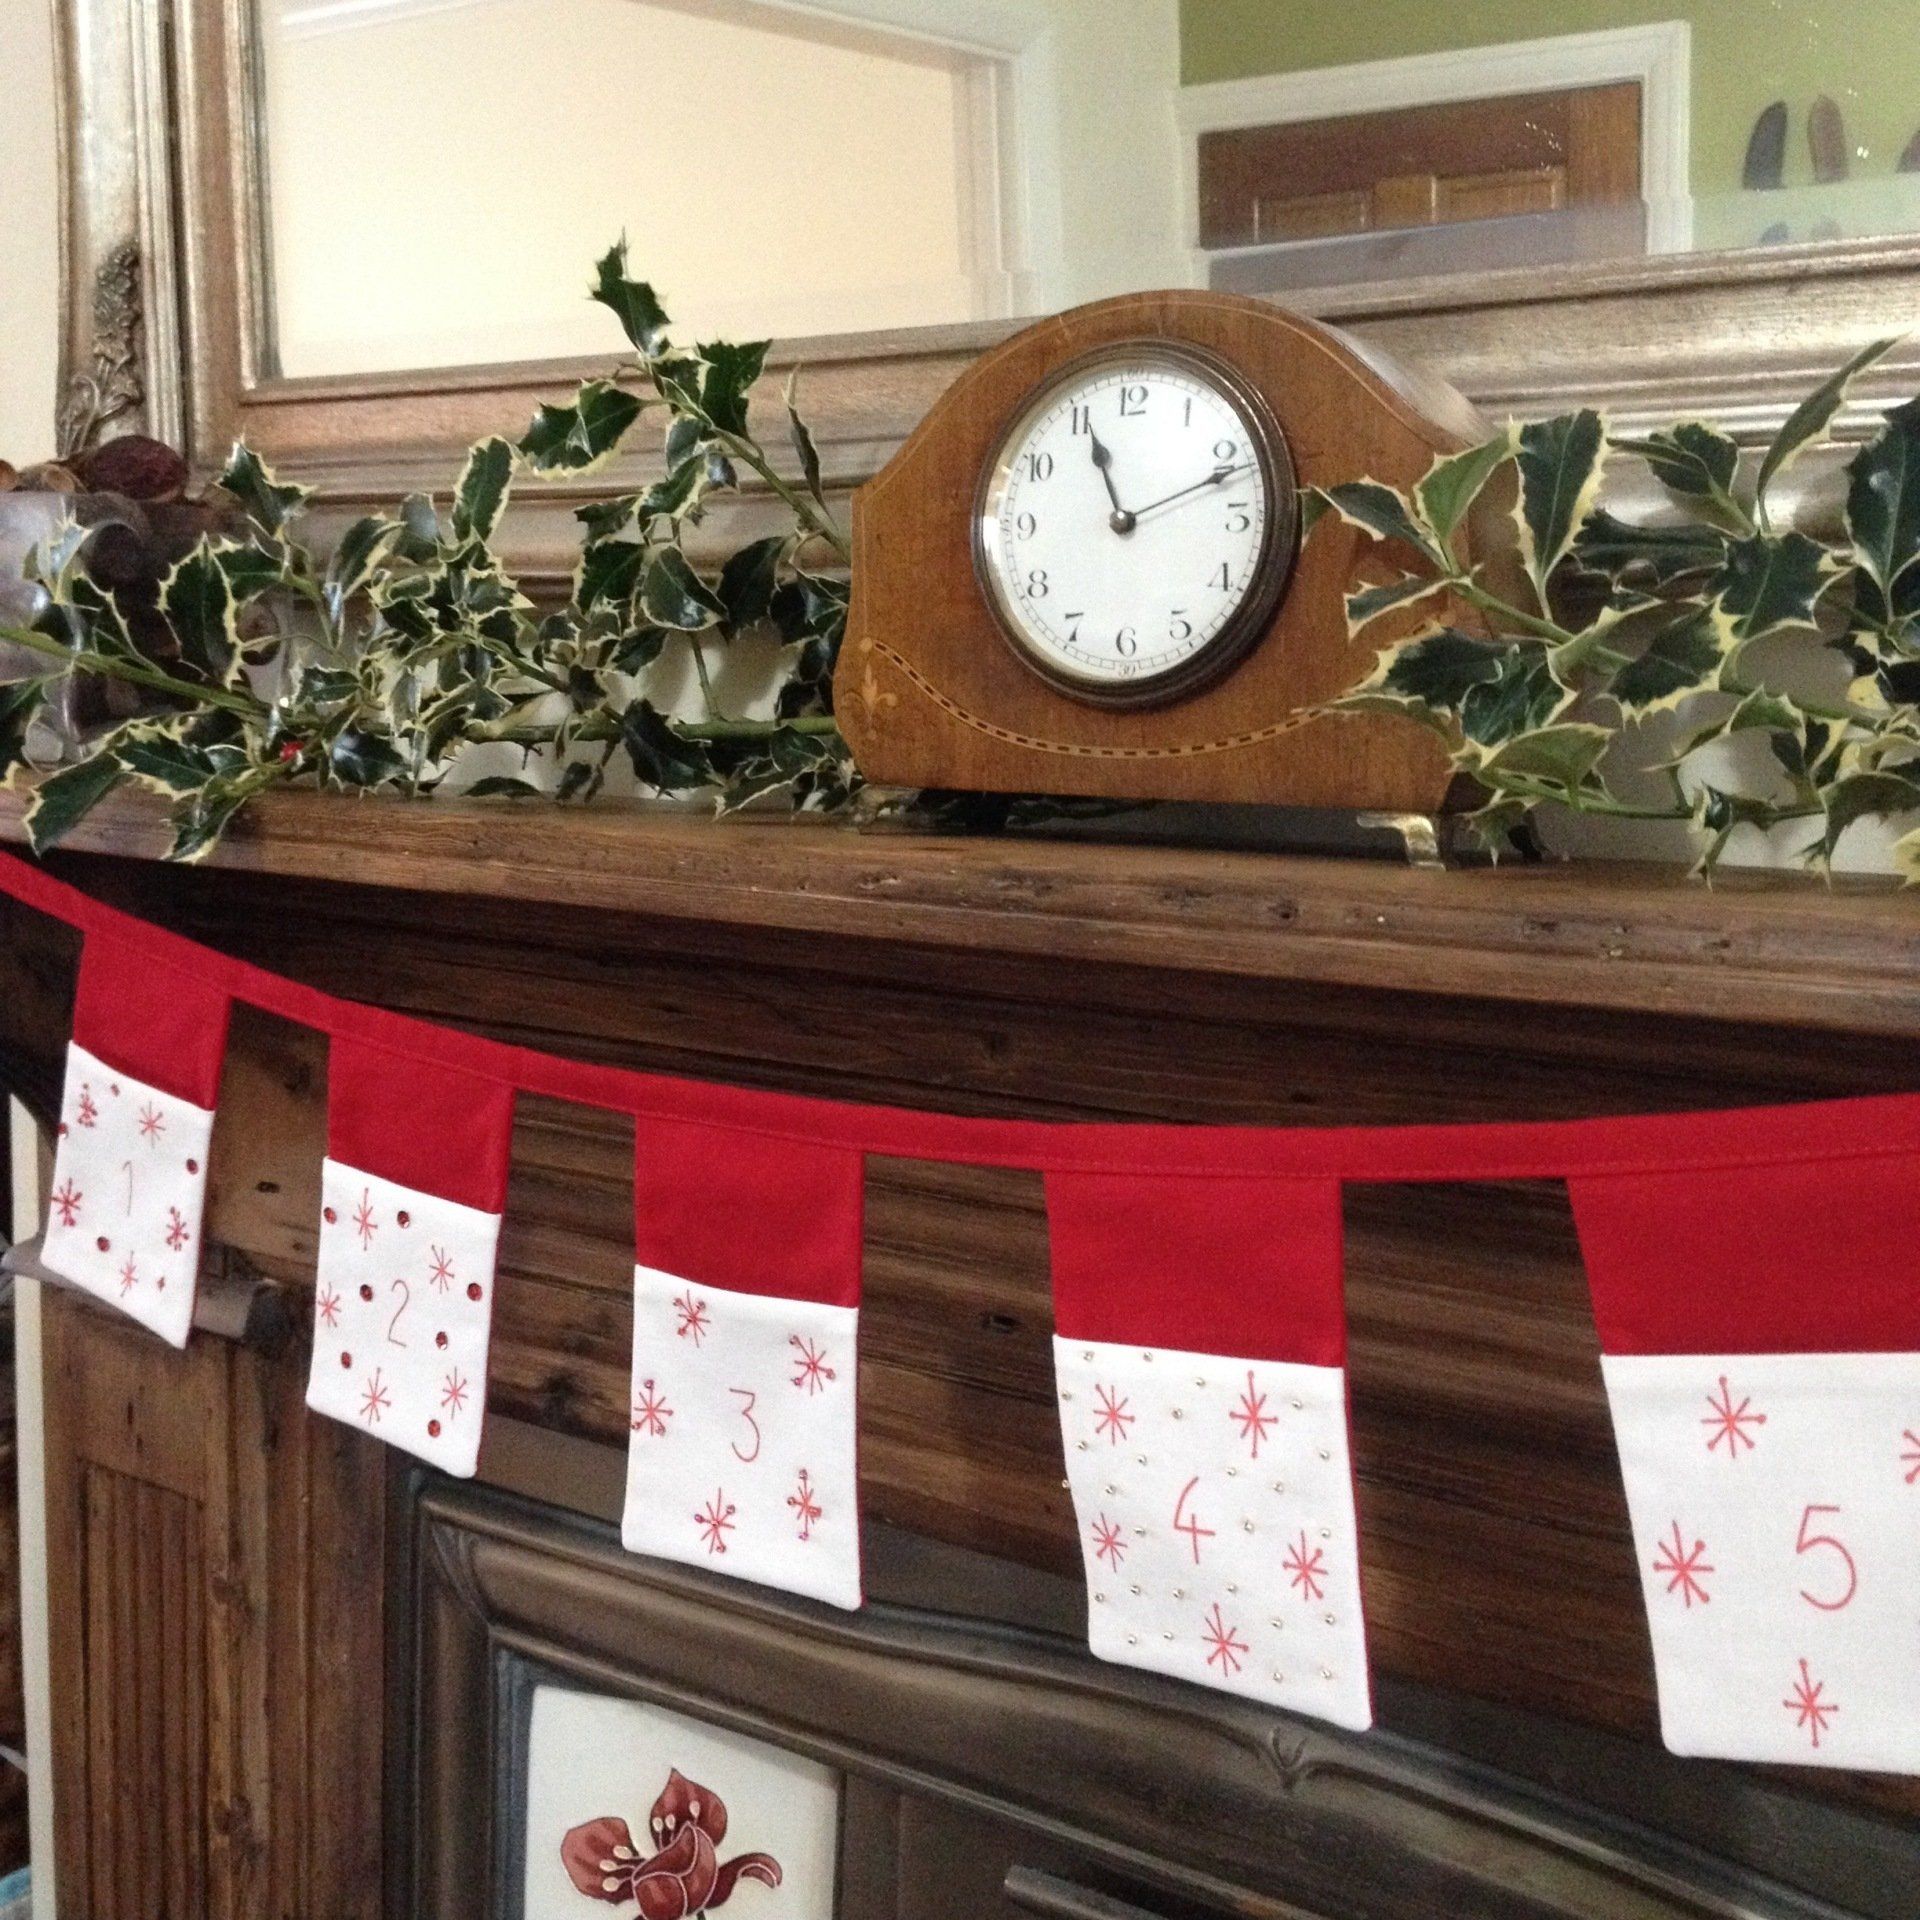
This bunting has pockets to fill with treats and festive challenges for your little ones on the run up to Christmas. You can make a long piece or break in into smaller sections depending on where you want to hang it in your home. You will need: 1 advent calendar panel 1.25m – 1.5m co-ordinating solid fabric (see point 8 below) Scissors / rotary cutter and mat / quilt ruler Thread Fabric marker – tailor’s chalk / fabric pencil, tape measure Cutting: cut along the red grid of your advent panel to give you 25 individual number squares. cut 25 squares of red fabric measuring 9.5 cm x 9.5cm cut 50 rectangles of fabric measuring 9.5cm x 14cm cut 4cm x length(s) you require for your bunting. (see point 8 below) If you want to decorate your number panels, do so before stitching up your bunting pockets, be sure to leave at least 1cm clear of the edges for seam allowance. 1 – right sides together, join a red square and a number square, stitching across the top edge with a 5mm seam allowance. 2 – from the wrong side, press the seam allowance towards the red fabric, then fold and press the red to the back of the number square. This will create the front of your pocket.